How I Revamped My Kitchen For Less Than £150

Girth: not a filter term you can enter into Rightmove but it was one of the main things we were looking for when we searched for a new house 9 months ago. Our old house was lovely in many ways but it was relatively narrow with little scope to add extra width (especially when it came to the kitchen). As soon as I saw the floor plan for our new house I knew it was the one because it had the girth that would allow me to have the spacious open plan kitchen/diner of my dreams. It is almost double the width of the old house but, in its current configuration, the space is divided up in a way that does not make the most of the space.

Our old kitchen was a lovely space but it was narrow

Our old kitchen was a lovely space but it was narrow

The desire for a wider kitchen/diner was one of the motivations for our move

The desire for a wider kitchen/diner was one of the motivations for our move

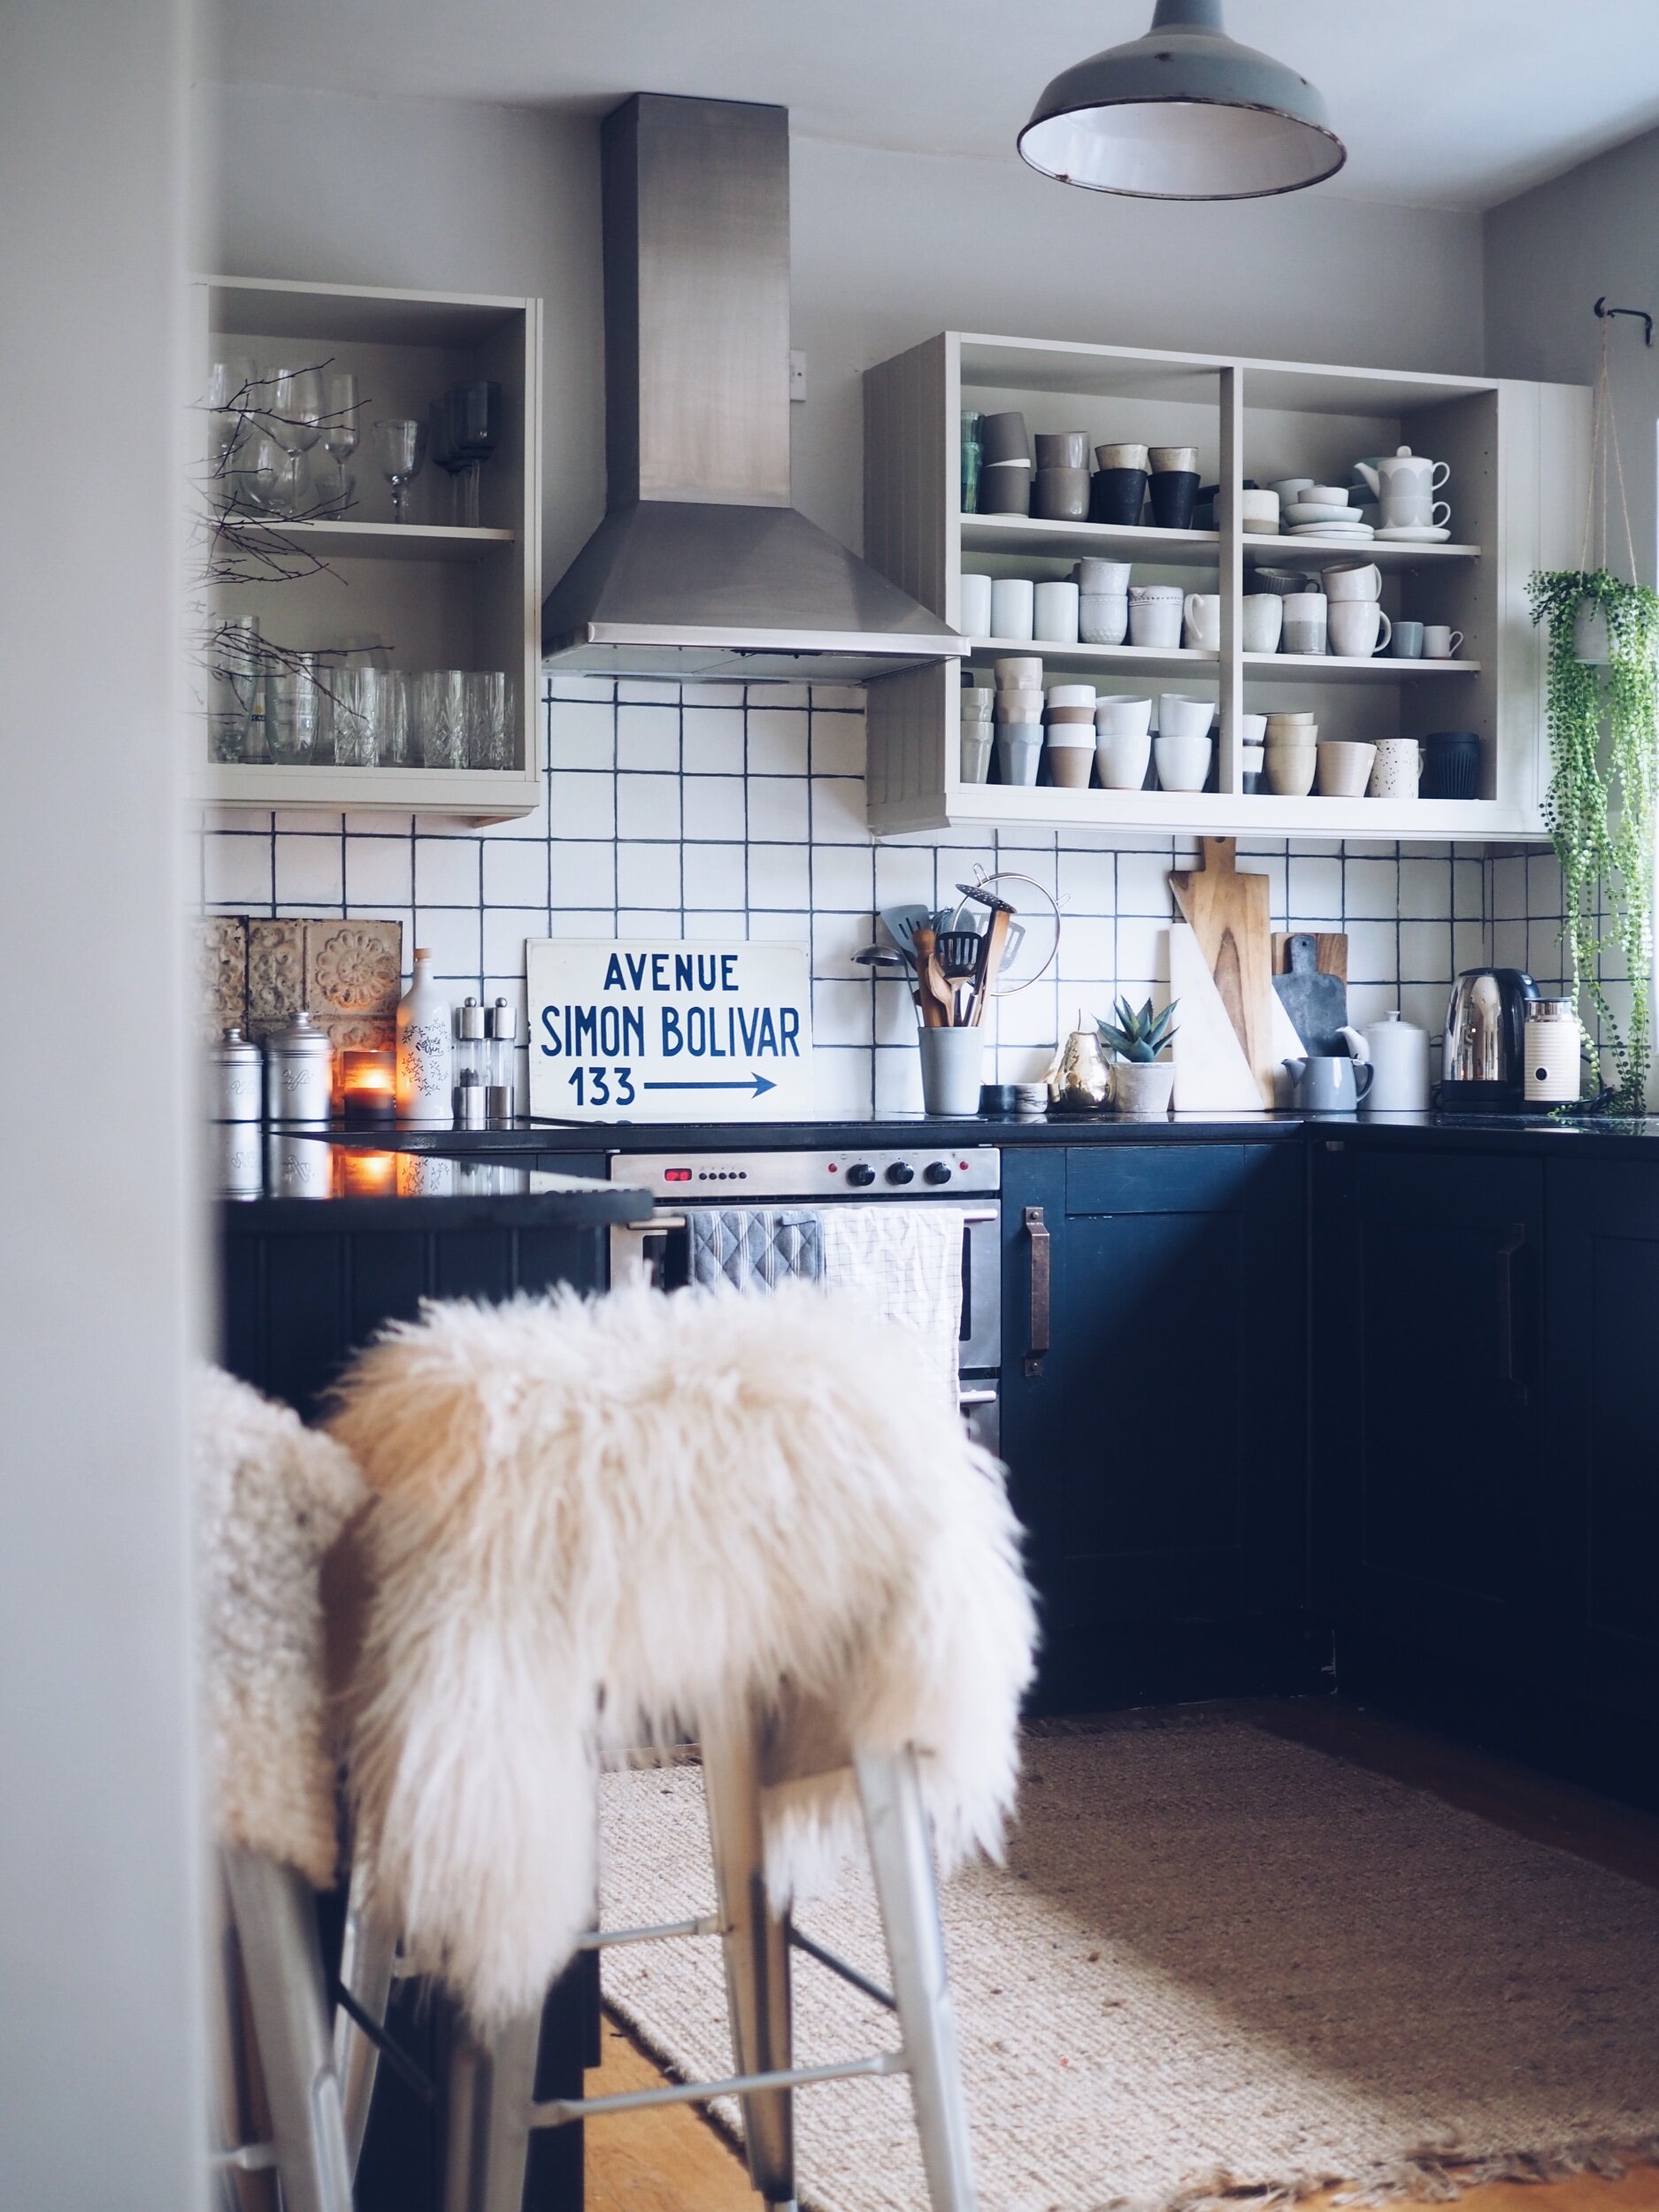
We have submitted a planning application to extend and reconfigure the space as well as to add a loft conversion. However, with a less than Roman Abramovitch sized bank balance, we are not currently sure how much of the work we will be able to complete in one go so it may be a while before I get the kitchen of my dreams. The kitchen we inherited was in OK condition and immaculately clean but it is just a little bit dated. So, before Christmas, I decided to embark on a mini makeover to #MakeItMoreMalmo in the short term. Because we are going to be doing a bigger renovation in the not so distant future I couldn’t justify ripping out and replacing things like the tiles and cupboard doors. My challenge, therefore, was to achieve the Scandi/Industrial look I was after by pimping what was already there.

The kitchen we inherited was clean and relatively light and bright it just felt a little bit dated.

The kitchen we inherited was clean and relatively light and bright it just felt a little bit dated.

I knew there were some simple inexpensive changes I could make that would bring the space instantly more up to date. Sphincter tighteningly for Mr Malmo, they mainly involved me, left over tins of paint from the garage and his electric screwdriver. The key areas I wanted to tackle were the tiles, the cupboards and the handles.

Adding in my own possessions helped to make it feel a little more homely to start with

Adding in my own possessions helped to make it feel a little more homely to start with

But I was itching to do something with the wall cupboards

But I was itching to do something with the wall cupboards

For the tiles I decided the simplest course of action was to paint them white and use a grout pen to give them a refresh. Now an experienced DIY blogger would no doubt have carefully researched and purchased both primer and specialist tile paint before embarking on this job. However, #SlapdashScandiHandyAndy bought a tin of ordinary white emulsion and a grout pen off Amazon and cracked on with the job after a couple of glasses of wine one Friday night.

Can of white paint at the ready I made a start on transforming the tiles

Can of white paint at the ready I made a start on transforming the tiles

Considering that my technique involved individually painting the tiles and filling in the corners using the brush from a child’s face paint set I would say it is a miracle I finished the job before 2022. Even more miraculous given said painting technique is the fact that the end result actually looks half decent (especially if you are squinting and have consumed four strong gin and tonics). It may not be the perfect paint job but it has instantly freshened up the kitchen and given it a much more contemporary feel.

If I was to do the job again I would definitely adopt a different painting technique though, using a roller to paint the tiles on mass rather than painting each one by hand!

As long as you squint the paint job looks pretty good!

As long as you squint the paint job looks pretty good!

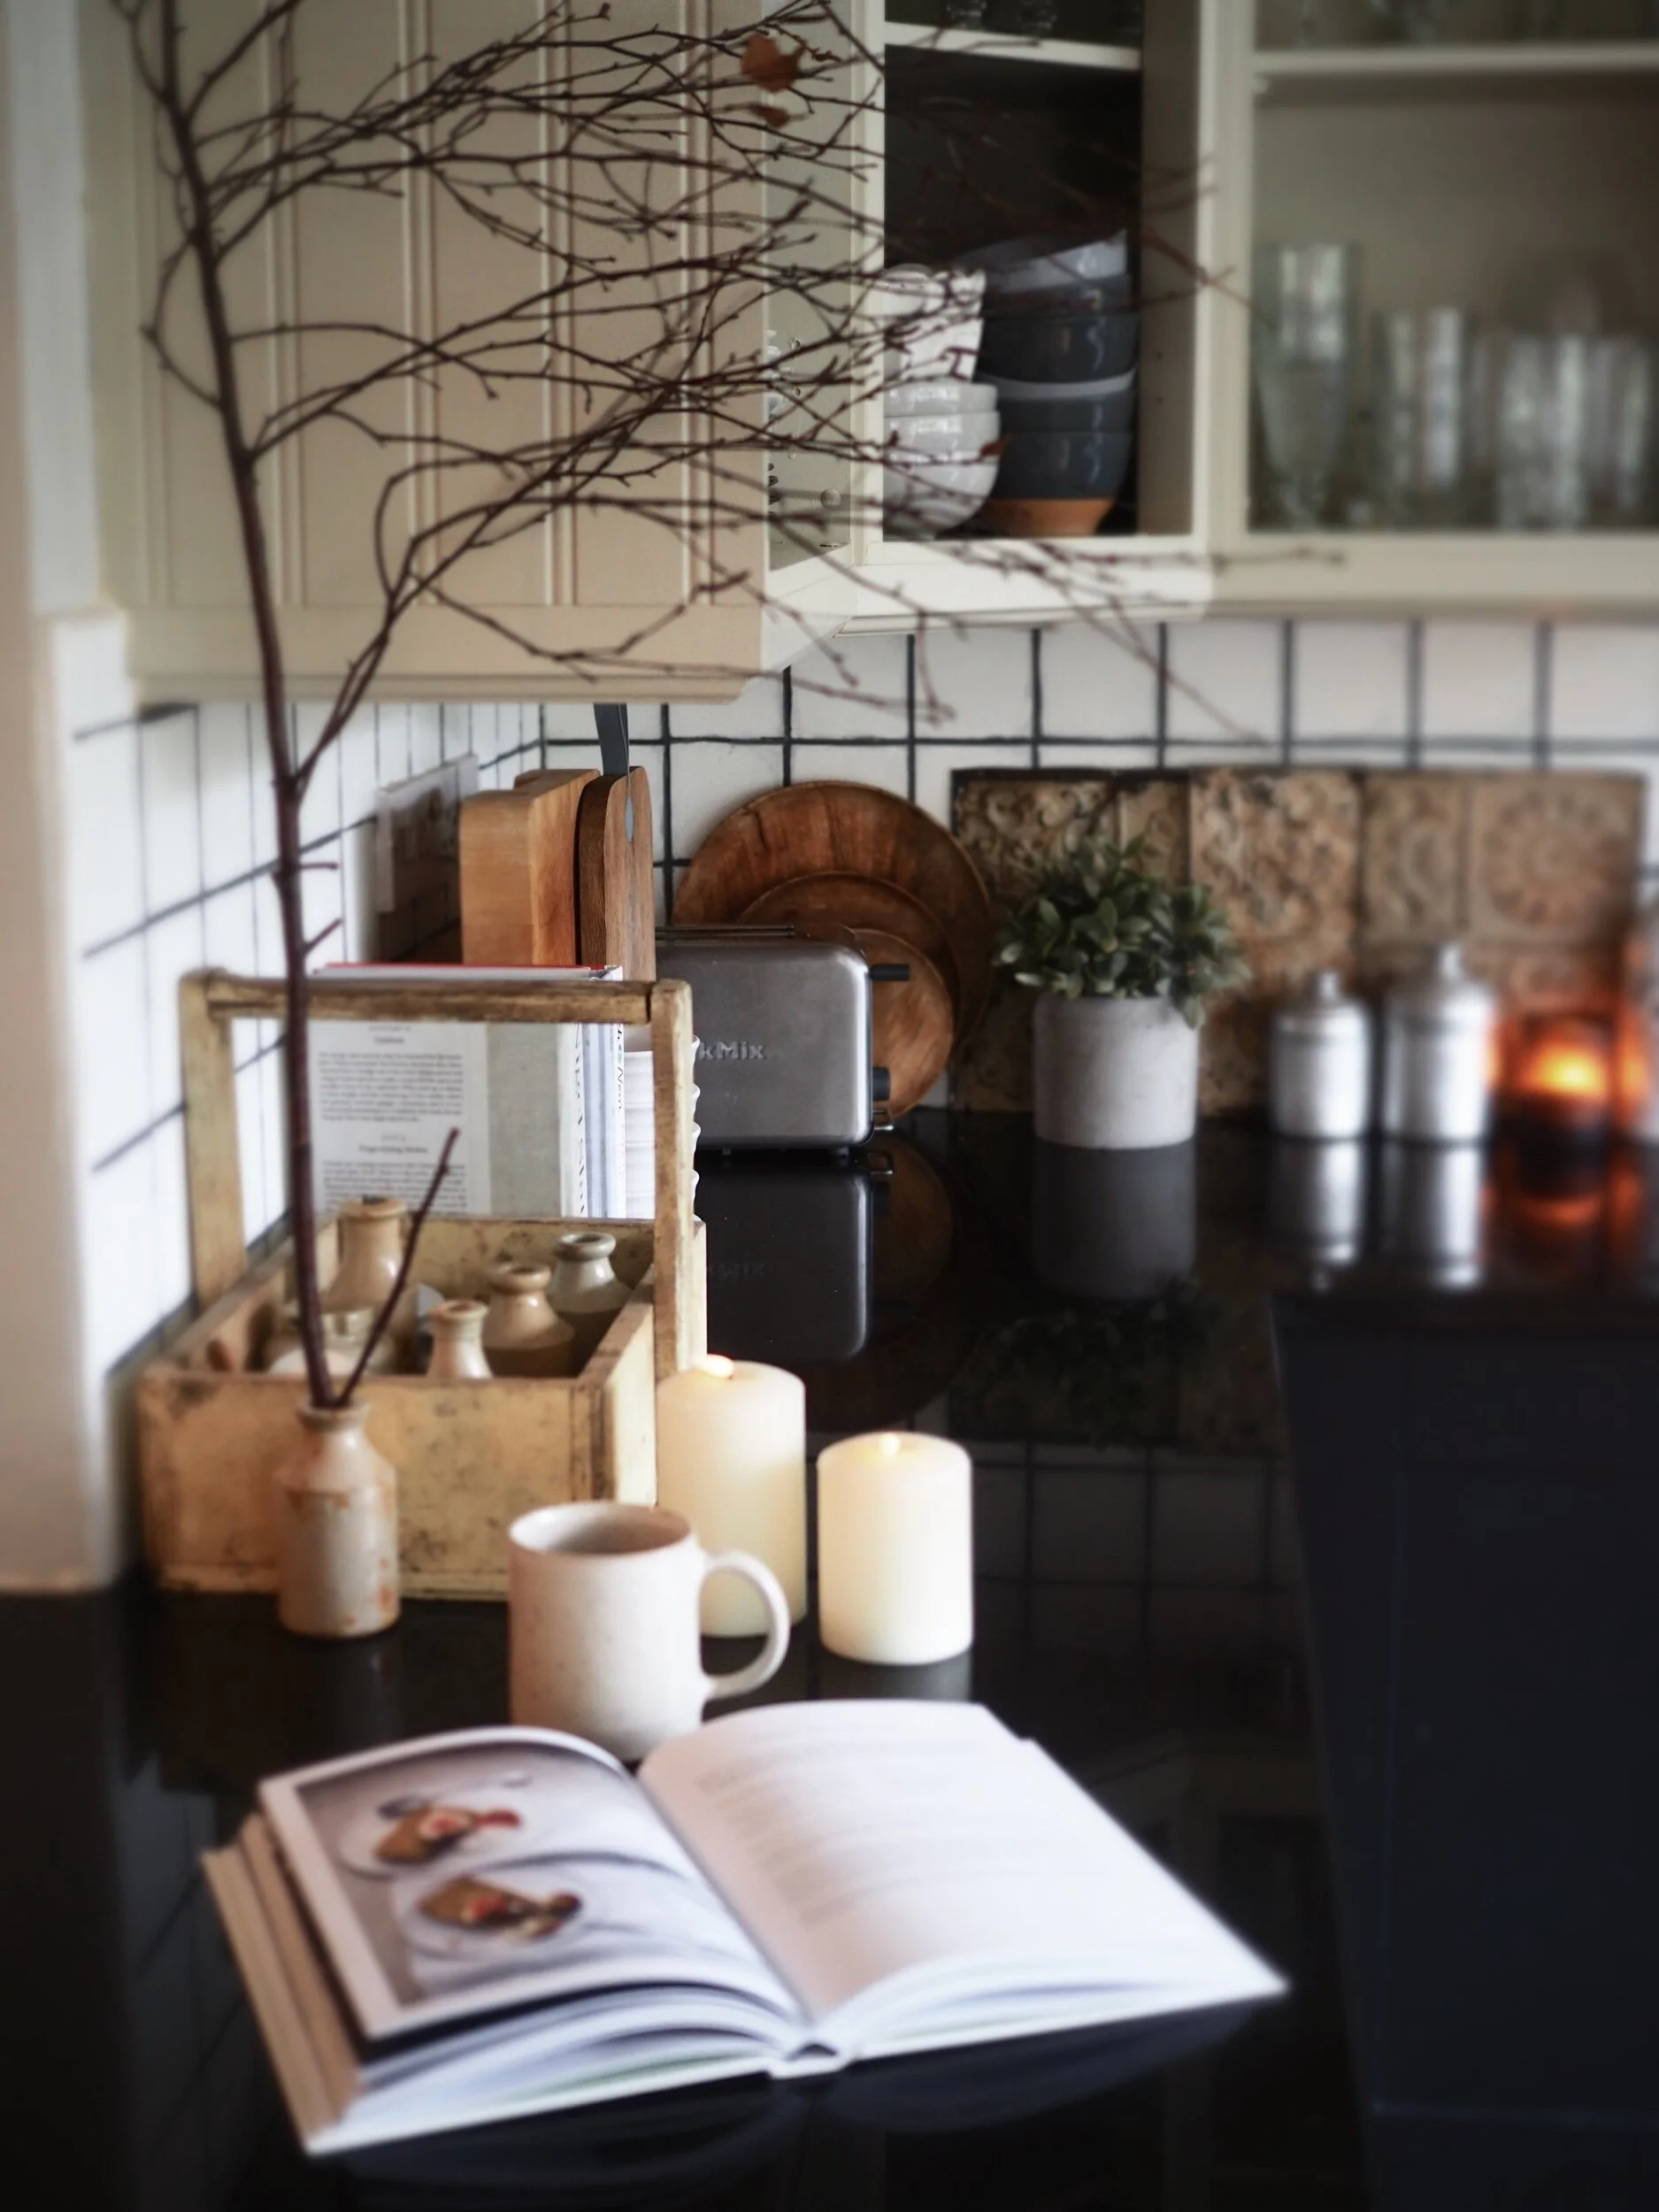
The newly painted tiles create the perfect backdrop for a bit of nonchalant recipe book reading

The newly painted tiles create the perfect backdrop for a bit of nonchalant recipe book reading

The second change I made was to #GoToWarOnTheWallCabinets. I know a lot of people like their crocks behind closed doors but I have always been more of an open shelf kind of girl. I like to wear my mugs on my sleeve. So from the moment we moved in I had the wall cupboards on my hygge hitlist. My ideal scenario was to take them off the wall completely and replace them with open scaffold board shelves. But I feared that might end in us having to replaster the walls which was definitely not on my budget kitchen makeover plan. So the compromise option was to take the doors off and paint the cupboards.

#SlapdashScandiHandyAndy in action

#SlapdashScandiHandyAndy in action

Even just one cupboard in I knew the decision to take the doors off was the right one

Even just one cupboard in I knew the decision to take the doors off was the right one

Usually I would rely on Mr Malmo for any job requiring a Black & Decker but in a bid to prove you don’t need a dick to (screw) drive I tackled this task myself. Having removed the doors I painted the cabinets in Portland Stone from Little Greene (I bought a 2L pot and had some left over by the end). No replastering was required and it means that my impressive/excessive mug collection is now back on display.

Wearing my mugs on my shelf

Wearing my mugs on my shelf

I love the interest, texture and (muted) colour they add to the kitchen

I love the interest, texture and (muted) colour they add to the kitchen

Is 79 an excessive amount of mugs to own (asking for a friend)

Is 79 an excessive amount of mugs to own (asking for a friend)

CDA95DF0-4A34-41A8-9C8B-E86F1FFB9EEE.jpeg

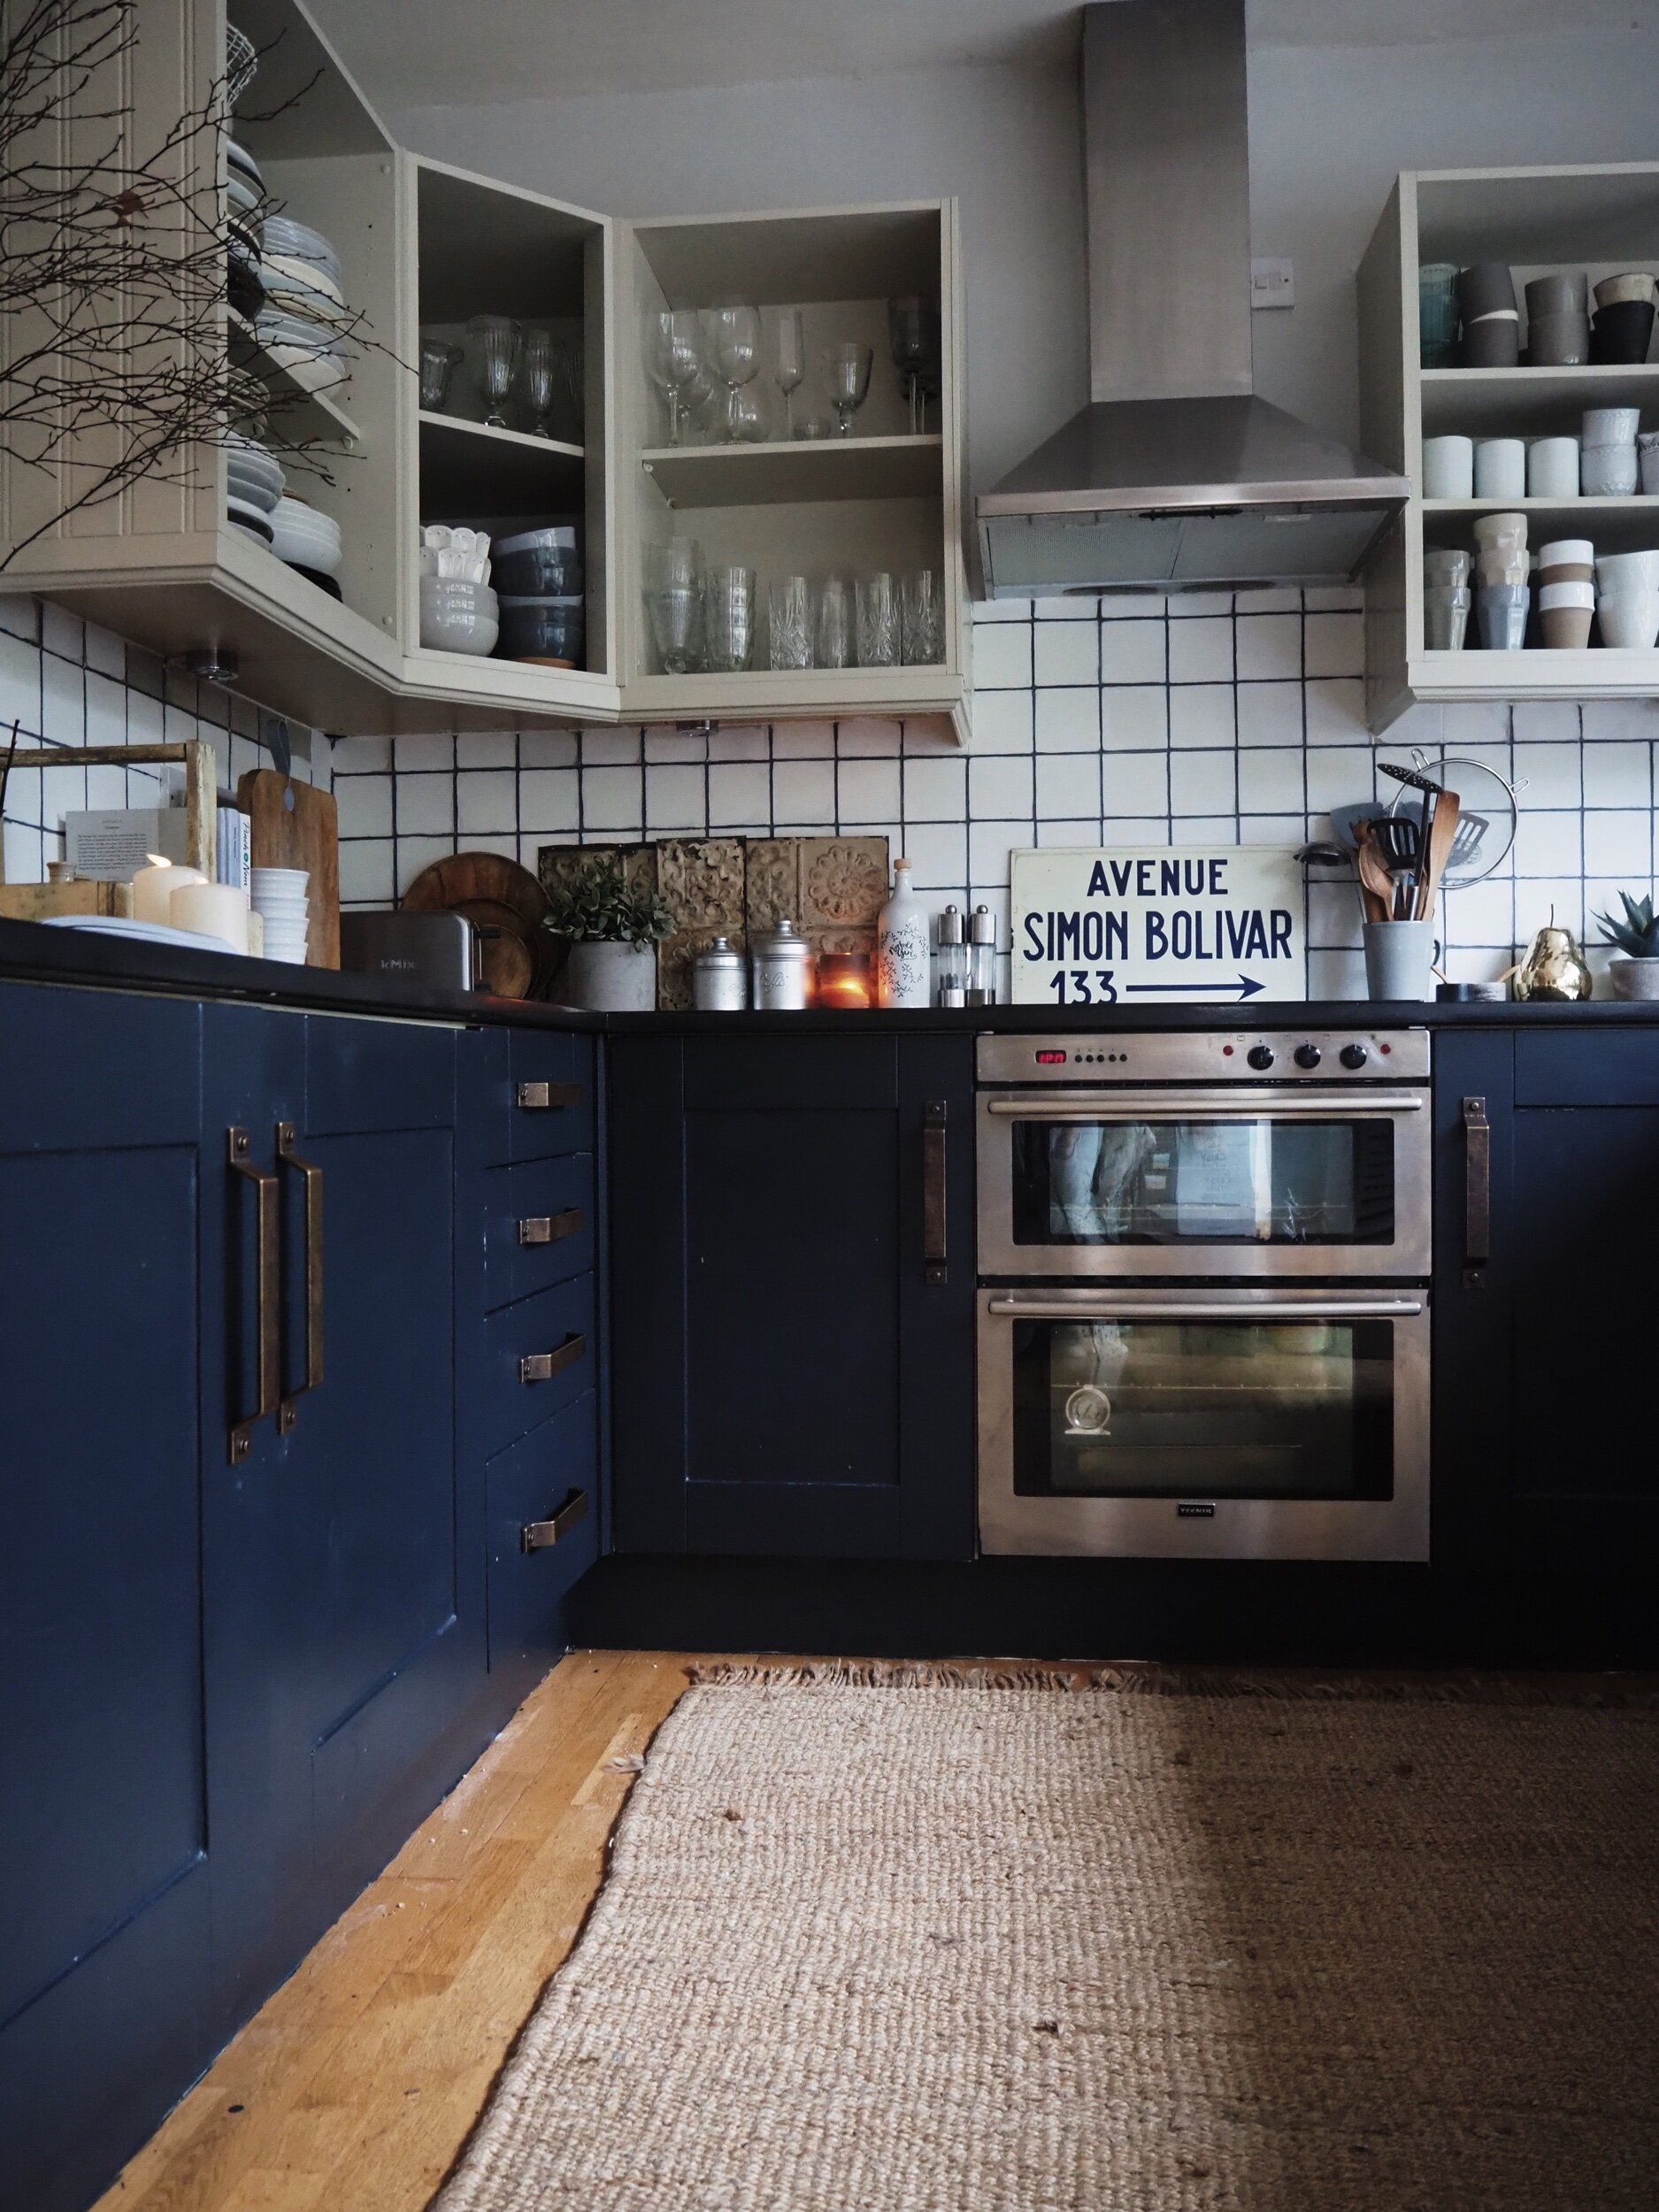
The next decision was what to do about the doors on the lower cabinets. I initially thought of also painting them in Portland Stone but when I tested the colour out on one of the cupboards it just felt a bit meh so I decided to dip a toe in the dark side instead (perhaps also inspired by the fact that I had 3/4 of a tin of leftover Railings paint in the garage). Whilst the upper cupboards were easy to paint the bottom ones were what can only be described as a complete bastard! Because I had tested out a few different shades on them before plumping for Railings it felt like Farrow & Ball could sense the presence of its Middle Class paint competitor and was determined not to be on the same cupboard as them! I should probably have stopped, gone and bought some primer and tackled the task afresh but that level of patience/preparation is not my DIY style.

If you don’t zoom in too close the paint job really doesn’t look too bad despite my epic struggle to get the paint to stay on the cupboard

If you don’t zoom in too close the paint job really doesn’t look too bad despite my epic struggle to get the paint to stay on the cupboard

However despite my struggles, as long as you don’t zoom in too close, I think it has turned out OK in the end. I don’t think I will ultimately chose to have a dark kitchen but, for now, I am definitely enjoying having a temporary flirt with dark side. With the (bad) paint job complete, the final finishing touch in my budget kitchen makeover was to update the cabinet handles (a couple of which had actually fallen off). I initially thought about going for a copper bar style handle but, echoing my mum’s thoughts about the casting of Timothy Chalamet as Laurie in the Little Women reboot, I decided that they were too modern for the part.

A sneak peek of one of the aged brass handles I opted for

A sneak peek of one of the aged brass handles I opted for

Instead I tracked down some aged brass handles from More Handles which were the princely sum of £6 per handle meaning the handle refresh came in at approximately £80. I have had pedicures that cost more (foot maintenance is an expensive business in London!). They really helped pull the makeover together and were super easy to fit.

I chose industrial style aged brass handles from More Handles

I chose industrial style aged brass handles from More Handles

F39005F9-D903-4236-99D0-2CF2BF26C536.jpeg
They were very easy to install and I love how they have changed the look of the cupboards

They were very easy to install and I love how they have changed the look of the cupboards

So what do you think of the end result? I added up what I spent on the white emulsion, grout pen, Portland Stone paint and the handles and it came to the princely sum of approximately £130. With the exception of the handles I have just worked with what was already there and I think it has really underlined to me that creating a space that feels contemporary and cosy does not have to cost the earth.

A cosy, homely kitchen that feels like Malmo for £130

A cosy, homely kitchen that feels like Malmo for £130

AAB56A07-D5DF-4201-B8B4-B0F08717C2D5.jpeg
192F64E7-118B-445A-96A1-91ADE201253D.jpeg
This is my favourite corner to hang out looking like William Shakespeare off to do a spot of DIY

This is my favourite corner to hang out looking like William Shakespeare off to do a spot of DIY

The one change that I didn’t make which I am now slightly regretting is painting the floor. The flooring is engineered wood but the boards have a quite shiny/orangey varnish finish and I have an urge to paint them an off white to take the edge off them. What do you think? Get my paint brush back out or leave well alone? Perhaps that will be one of the changes I make in Malmo’s Mini Kitchen Makeover Part II as there is actually another part of the kitchen that I haven’t shown you yet! I can’t wait to share my plans for the rest of the space with you soon and maybe this time I will invest in some primer…..

The shiny floorboards that I have an urge to paint off white. Please ignore the fact that I should have hoovered before I took this photo!

The shiny floorboards that I have an urge to paint off white. Please ignore the fact that I should have hoovered before I took this photo!

New kitchen and a new fringe - only one of them now looks like I borrowed it from Rod Stewart

New kitchen and a new fringe - only one of them now looks like I borrowed it from Rod Stewart

F25D8C13-F79F-4C6B-B24B-C5C54DB83F32.jpeg
A full frontal of the newly revamped kitchen

A full frontal of the newly revamped kitchen

Taking a break from painting but I am already plotting Part II of the kitchen makeover

Taking a break from painting but I am already plotting Part II of the kitchen makeover

Autumnal Table Styling Ideas

There are a couple of job interview questions I always struggle to answer. The first is “what is your greatest weakness”. This is not tricky because I think I am perfect but more because the answer on the tip of my tongue is always Cornish Cruncher Extra Strength Cheddar Cheese and a packet of Pickled Onion Monster Munch rather than the more employment friendly “a small blind spot when it comes to understanding full functionality of the wrap text field of Microsoft Excel.” Second on my list of dreaded questions is “tell me about your hobbies”. I am pretty sure the “You’re Hired” answer has something to do with running triathlons whilst reading ‘A Brief History of Time’ whereas in truth one of my favourite ways to while away my leisure time is creating seasonal tablescapes. So when Sainsbury’s Home asked me if I would like to pick a few items from their Autumn/Winter range for my kitchen I was in my hobby heaven

My kitchen in October

My kitchen in October

After 11 years of marriage and 14 years of dating a remarkably high percentage of our shared kitchenware still dates back to our student days when it was put through its paces cooking high end cuisine such as beans on toast and fish fingers on a bed of super noodles (don’t knock it until you have tried it people). With the motely selection we have accrued approaching the end of its life I chose a selection of kitchen and tableware from the rustic retreat and escape ranges that Sainsbury’s have introduced this Autumn/Winter. I selected Scandinavian inspired items in a neutral colour palette of soft greys and natural materials such as wood that would stand the test of time in my kitchen beyond this season. Affordable homeware doesn’t have to mean disposable homeware.

My scandinavian kitchen with grey kitchen units, open shelving and metro tiles on the wall. It is a light, contemporary kitchen with modern rustic feel #modernrustic #contemporarykitchen #greykitchen #kitchenideas #kitchendesign

I put them through their paces cooking a couple of my favourite autumnal recipes, taken from a book I cook from on repeat: Seasons by Donna Hay. The photography and the food are both amazing. The recipes I selected both use just 4 main ingredients and can be whipped up with about 5 minutes preparation: perfect for a quick but delicious midweek meal if, like me, you often need to cook with a toddler attached to a leg and whilst shouting at someone to stop playing FIFA and start doing their homework.

upload.jpg
upload.jpg

I sourced all of the ingredients for the recipes from our local Sainsbury’s which I think it is fair to say is where I spend about 35% of my life in trying to keep up with the insatiable appetites of 3 hungry sons who consume sliced bread, bananas and milk at an alarming rate.

Butternut squash after a struggle chopped up and ready to go in the oven once mixed with some olive oil and seasoned

Butternut squash after a struggle chopped up and ready to go in the oven once mixed with some olive oil and seasoned

Butternut Squash, Mozzarella and Palma Ham Salad

Ingredients (serves 2-3)

2 Butternut Squash, 375g Mozzarella Cheese, 500g Palma Ham, handful of thyme, salt and peppper to season

Method

It is so simple to make there is almost need to type out instructions! Basically you peel the Butternut squash then chop into wedges (this is the hardest part as I ending up sweating like a shotputter trying to slice through a particularly stubborn butternut), place on a tray, drizzle with olive oil and season then cook for 25-30 mins. In the meantime tear up the mozzarella and cut the palma ham into strips. Take the butternut squash out of the oven and combine in an instagram friendly fashion on a plate scattering chopped up thyme on to taste. Simple to make but totally delicious

Larking around with my big butternuts….

Larking around with my big butternuts….

I may look calm and composed in this picture but the outtakes capture me looking like an irate Bulgarian shotputter after the butternut refused to yield to my knife.

I may look calm and composed in this picture but the outtakes capture me looking like an irate Bulgarian shotputter after the butternut refused to yield to my knife.

Having emerged victorious from the #BattleOfTheButternut I set to work on the fun part: creating my tablescape. I chose dinner plates and pasta bowls from the Urban Escape range in a lovely muted grey. They are the kind of plate that you can use everyday without fear of chipping and stick in the dishwasher but their simple Scandi good looks lend themselves to fancier dining as well (featuring non-beige food). To compliment the plates I also selected a really lovely carafe and set of wine glasses in a smoked grey and I loved the contrast they create with the plates

Smoked grey wine glasses and carafe from the Urban Escape range and an oak chopping board from the Rural Retreat range

Smoked grey wine glasses and carafe from the Urban Escape range and an oak chopping board from the Rural Retreat range

Tablescape set and ready to receive food! I love how the simple minimal scandi style of the tableware and glasses works against vintage items that I added to the table to create texture and warmth

Tablescape set and ready to receive food! I love how the simple minimal scandi style of the tableware and glasses works against vintage items that I added to the table to create texture and warmth

The oak chopping board makes the perfect centre piece for bread to share, this is clearly not a tablescape for dining with the kids as the bread would be the far less instagrammable Hovis 50/50 medium sliced otherwise…

The oak chopping board makes the perfect centre piece for bread to share, this is clearly not a tablescape for dining with the kids as the bread would be the far less instagrammable Hovis 50/50 medium sliced otherwise…

Butternut squash, palma ham and mozzarella salad. Simple but totally delicious and the battle with the butternut guarantees you will probably burn more calories in preparing it than you will consume eating it!

Butternut squash, palma ham and mozzarella salad. Simple but totally delicious and the battle with the butternut guarantees you will probably burn more calories in preparing it than you will consume eating it!

I love the contrast that the smoked grey glasses create with the plates and it all pops out when using a dark linen table cloth as a backdrop

I love the contrast that the smoked grey glasses create with the plates and it all pops out when using a dark linen table cloth as a backdrop

Vintage wooden kitchen table set with grey linen table cloth, pale grey plates and bowls from Siansbury's Home and rustic oak chopping board #rustickitchen #tablesetting #autumntableideas #autumnalinteriors

For pudding I turned once more to Donna and selected a delicious sounding maple and pear tarte tatin.

Maple Pear Tarte Tatin

Ingredients (serves 4-6 depending upon how greedy they are!)

6 dessert pears, 375g puff pastry, 4 spoonfuls of golden syrup, 80g of butter

Method

Peel and slice the pears to about a one pound coin thickness (which are a joy to work with compared to the bastard butternuts). Melt the butter in a pan over a medium heat and then add to syrup and bring to the boil. Turn down to a simmer for 2 minutes and then remove from the heat. Arrange the pears to cover the bottom of a 20cm oven proof pan and then pour over the butter/syrup mixture. Then place over the top the puff pastry cut to a 22cm circle and place in the oven. Cook for 20 mins (or in my case until the smoke alarm goes off because some of the syrup mixture has escaped the pan and formed a mini bonfire on the bottom of the oven). Serve with creme fraiche or clotted cream

The kitchen set read for round two. Gorgeous grey mixing bowl and wooden and grey silicone cooking utensils pictured all from the Rural Retreat range

The kitchen set read for round two. Gorgeous grey mixing bowl and wooden and grey silicone cooking utensils pictured all from the Rural Retreat range

Taking time out for a cup of tea and praying that pears are easier to peel than butternuts…

Taking time out for a cup of tea and praying that pears are easier to peel than butternuts…

Bowl and whisk pictured from the Rural Retreat range. Behold the Maple Pear Tart Tatin of dreams

Bowl and whisk pictured from the Rural Retreat range. Behold the Maple Pear Tart Tatin of dreams

But will mine turn out this well?!

But will mine turn out this well?!

It is a stunningly easy and delicious dessert to make and it was a dream to use new kitchen utensils which had not seen active service in the University of Manchester Halls of Residence kitchens mainly stirring supernoodles. I love the earthy contrast of the oak handles of the rural retreat range against the scandi inspired grey. They look great against the white metro tiles in my kitchen and make my utensil selection about 100% more stylish!

Mixing the pears in with the butter and syrup mixture and trying not to set light to my ill advised take on chefs whites

Mixing the pears in with the butter and syrup mixture and trying not to set light to my ill advised take on chefs whites

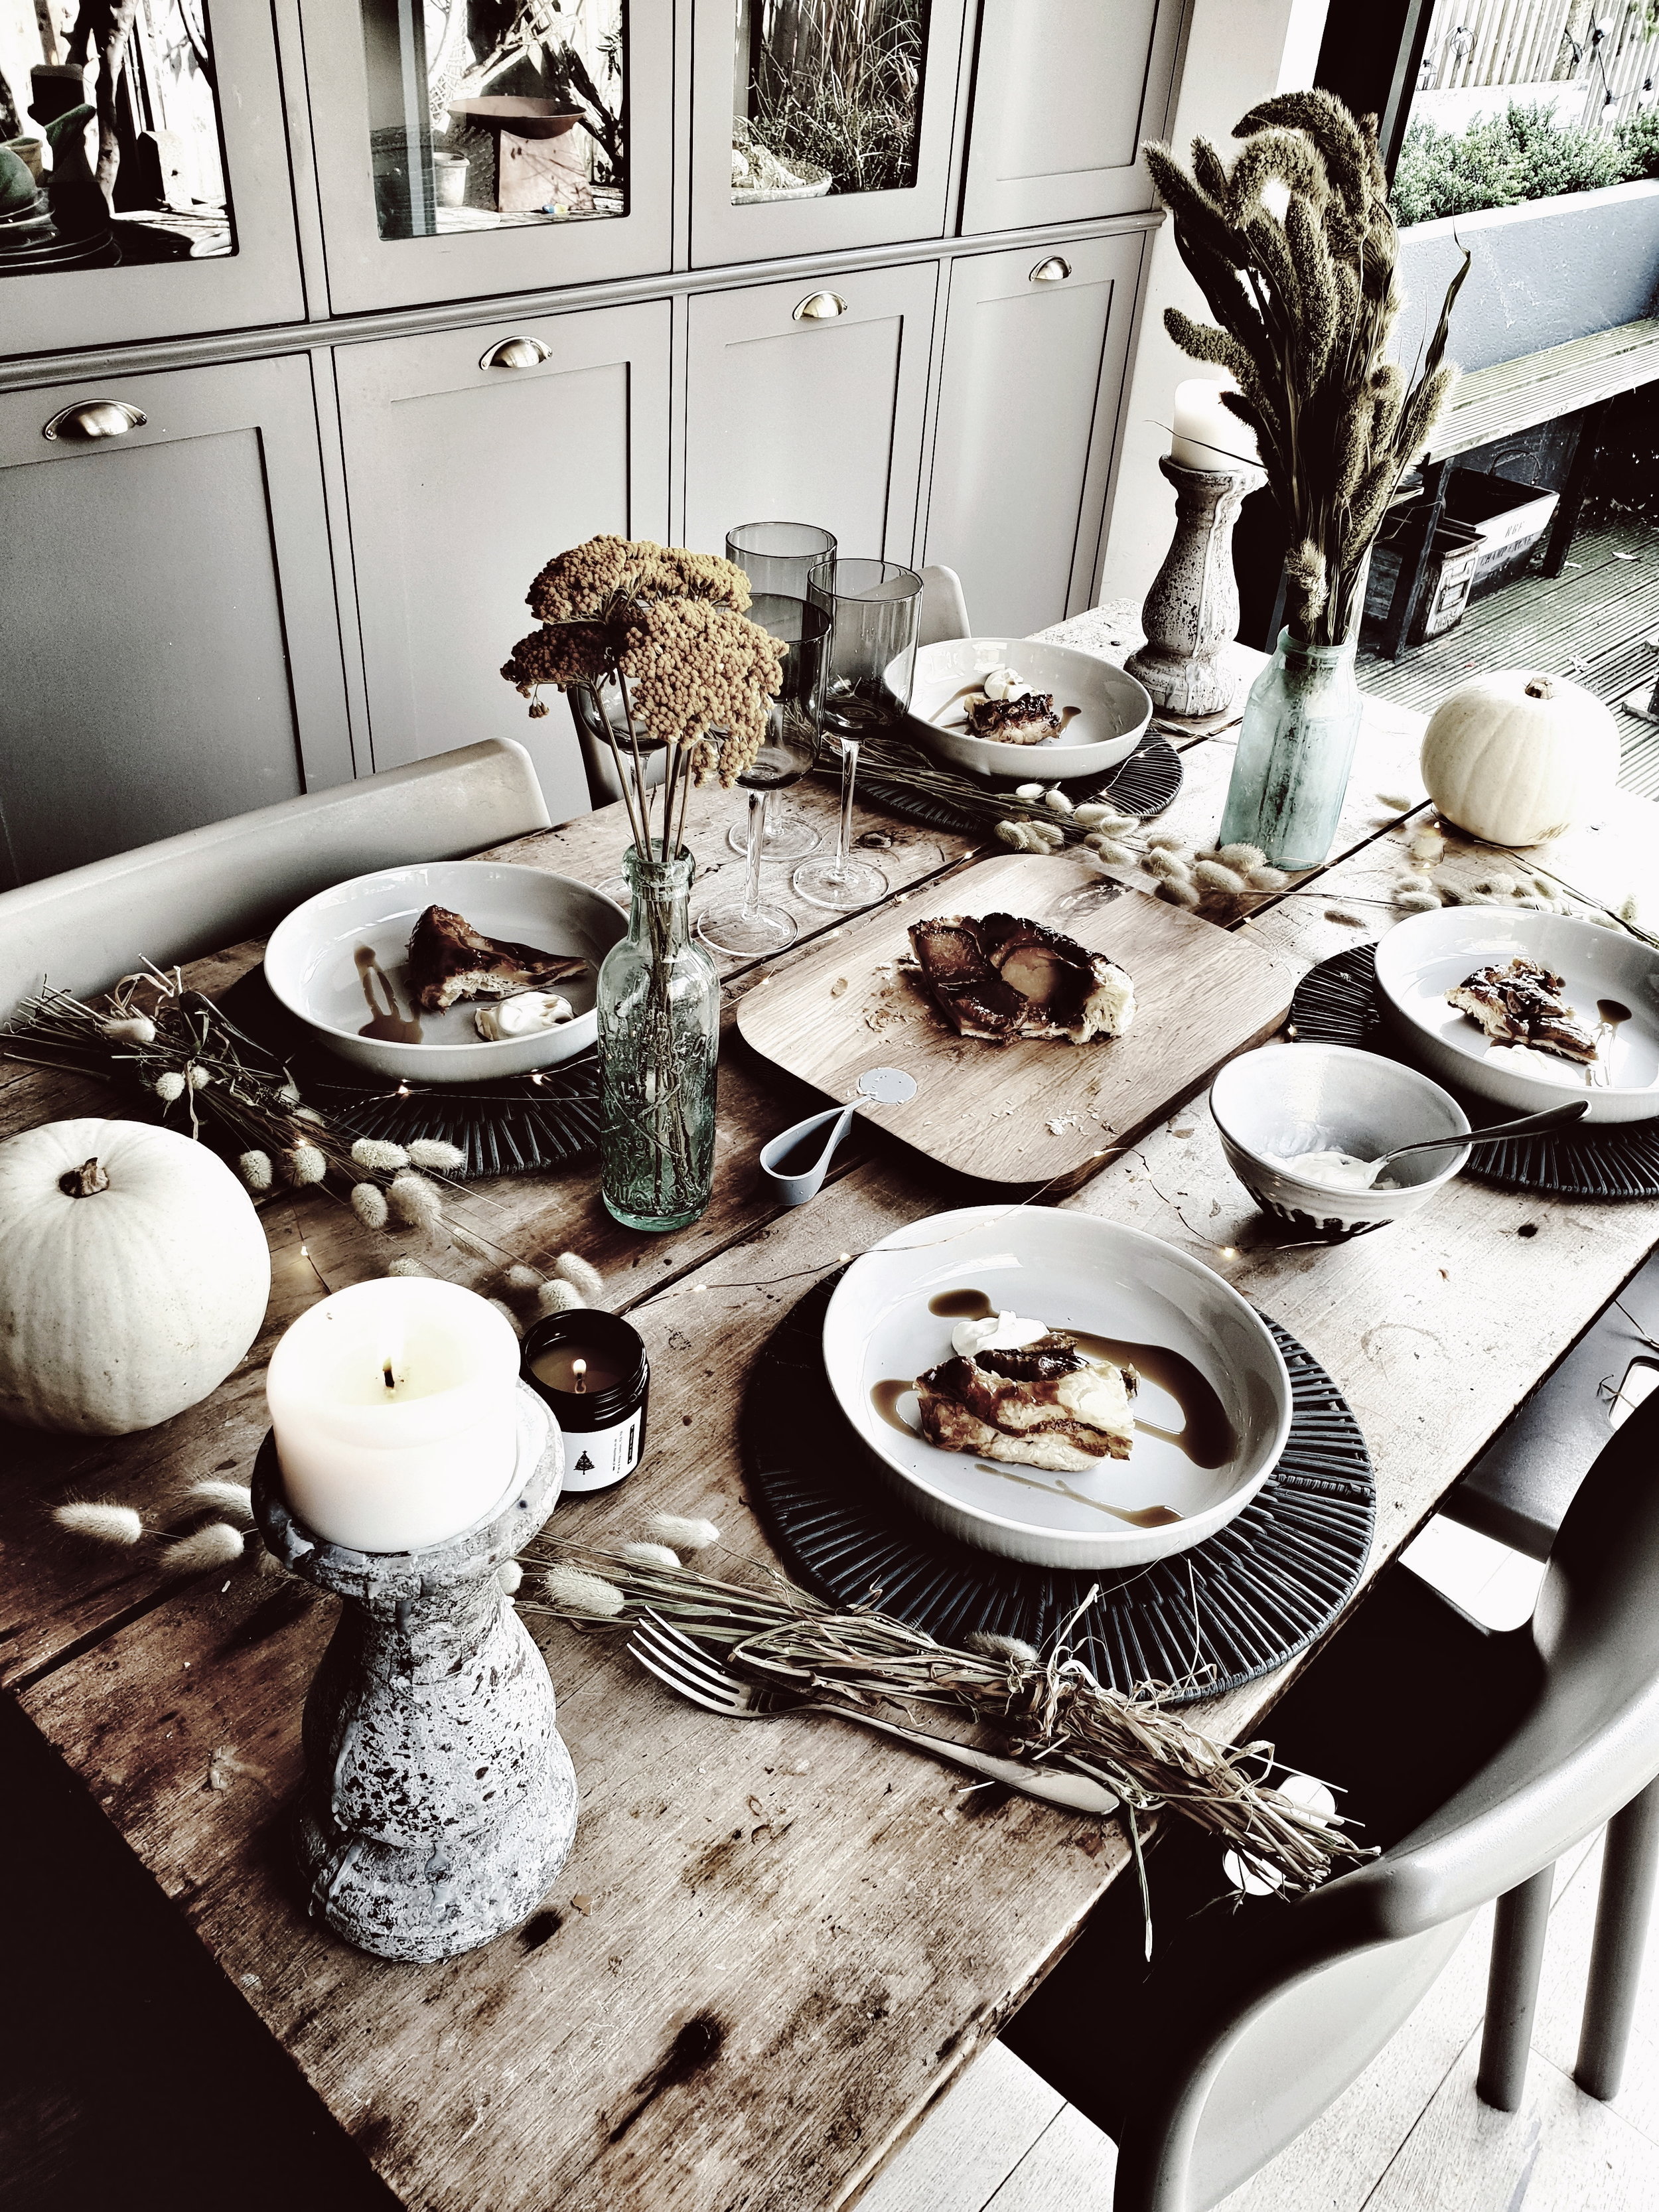
With the tarte tatin in the oven I performed a quick turnaround on tablescape number two. Whipping away the table cloth to reveal the natural texture of our vintage farmhouse kitchen table and adding in some gorgeous dried flowers in autumnal colours and some scandi white pumpkins to up the autumn factor. I love the contrast between the texture of the table and the simple pale grey of the plates. The pasta bowls are great for serving dessert in as you can add in a drizzle of maple syrup and dollop (is there a more satisfying word known to man?!) of creme fraiche without fear of it escaping!

The dark grey table mats look great against my vintage farmhouse table. They are available in store but not online

The dark grey table mats look great against my vintage farmhouse table. They are available in store but not online

White pumpkins adding a modern rustic touch to the table

White pumpkins adding a modern rustic touch to the table

I also added in these lovely rattan table mats from the Urban Escape range (available in store but not online) to provide a bit of additional contrast, they are a timeless style and colour that I know I will get lots of use out of. I used the oak chopping board to display the tarte on which turned out pleasingly like the picture despite its emergency evacuation from the oven

Dried flowers are a great alternative to fresh as they can last you through the Autumn season and beyond and are really versatile.

Dried flowers are a great alternative to fresh as they can last you through the Autumn season and beyond and are really versatile.

I love how the new items I have added from the Rural Retreat and Urban Escape ranges mix with my collection of vintage bottles and the natural texture of my french farmhouse table

I love how the new items I have added from the Rural Retreat and Urban Escape ranges mix with my collection of vintage bottles and the natural texture of my french farmhouse table

Just add creme fraiche and a drizzle of maple syrup to serve

Just add creme fraiche and a drizzle of maple syrup to serve

Pear Tarte Tatin served up on pale grey plates from Sainsbury's Home on a rustic wooden farmphuse table and set with vintage bottles and dried flowers for a modern rustic feel #farmhousekitchen #farmhousedecor #kitchentable #vintagekitchentable #aut…

So there you have it, two ideas for autumnal tablescapes with a rustic Scandi twist. I hope you enjoy giving the recipes a try and updating your kitchen with the Rural Retreat and Urban Escape ranges from Sainsbury’s Home.

Pear Tarte Tatin served up on pale grey plates from Sainsbury's Home on a rustic wooden farmphuse table and set with vintage bottles and dried flowers for a modern rustic feel

This blog post was kindly sponsored by Sainsbury’s Home