Things I had planned for 2020: giving my dining space a give it a Scandi Rustic revamp. Things I did not have planned for 2020: home schooling my kids for six months whilst trying to hold down my day job, write a book and keep a vague grip on my sanity. The latter slightly delayed the former but I am super excited to finally be able to show you the finished room!
To quickly recap: in the longer term we have big plans to create a contemporary open plan kitchen/diner, knocking down walls to combine three rooms into one. But in the short term I wanted to give the kitchen/dining space a refresh - toning down tango floors, adding timber cladding to create texture, refreshing the walls, removing a radiator cover bigger than our car, switching up the lighting and stretching my DIY skills to the limit by creating some faux crittall doors.

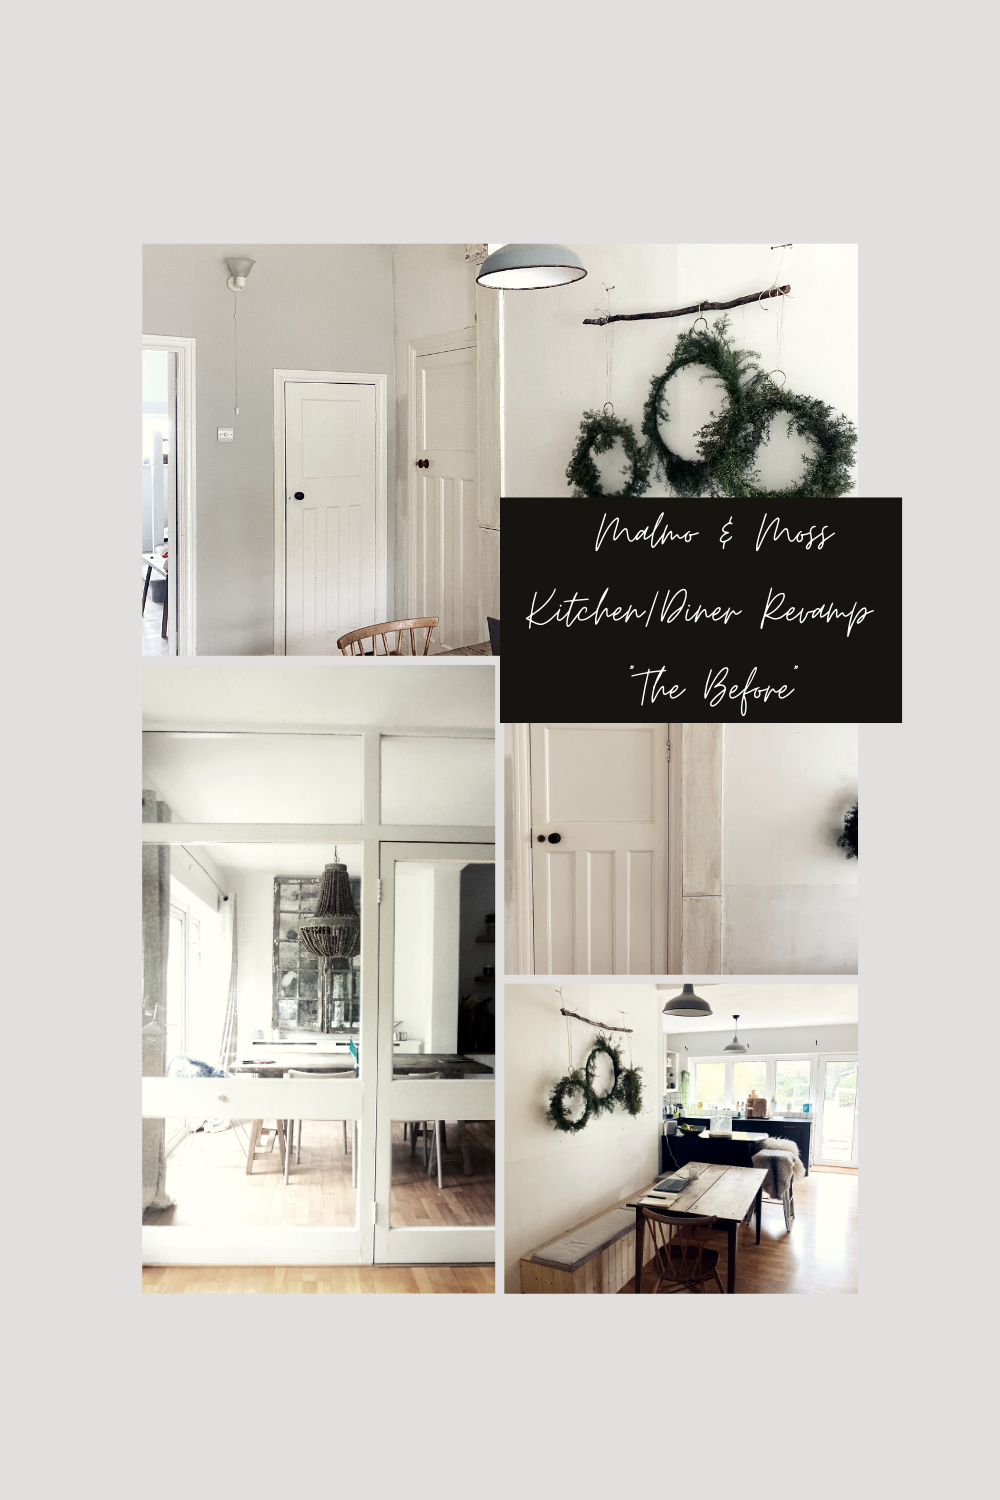
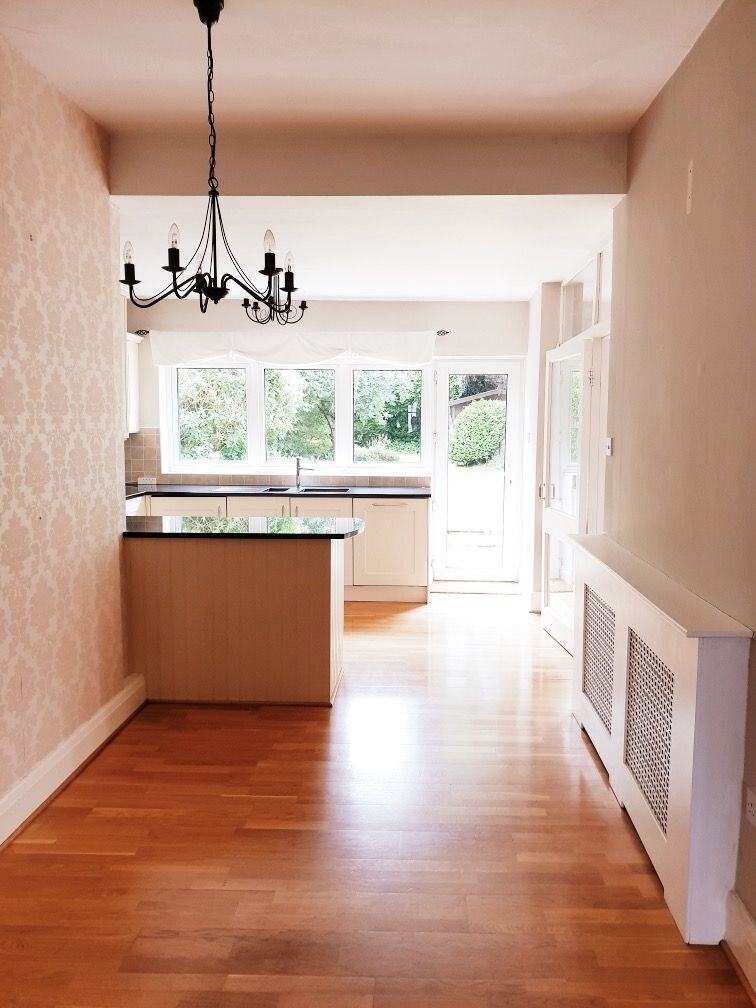
The Before. This is how the room looked when we moved in.

My moodboard for the revamp working in paid collaboration with Neptune
Working with Neptune, my dream interior brand, I have transformed the previously gloomy, cramped feeling space into a light, bright dining space that is now the hub of our home. So let me take you on a tour!
Working wonders on the walls
I think the lady who lived in the house before us was actually a secret senior Scandi fan because almost all of the walls in the house were painted in a neutral colour palette. However in a couple of places her inner Lawrence Lwellyn Bowen let loose and added flock wallpaper to the mix including on one of the walls of the kitchen. Having steamed it off in haste and then repented at my leisure - adding Neptune’s Cranbrook shiplap cladding has added some much needed (non Llewellyn Bowen) character to the room. Made from Norwegian Spruce (the Morten Harket of the timber world) you can keep it raw or have it stained in 16 different colour ways. Because the space is fairly narrow with not much natural light to speak of I have also refreshed the other walls using Neptune’s signature white paint: Snow. It is the perfect, fresh white and works perfectly as a base to build colour and texture around in a room.
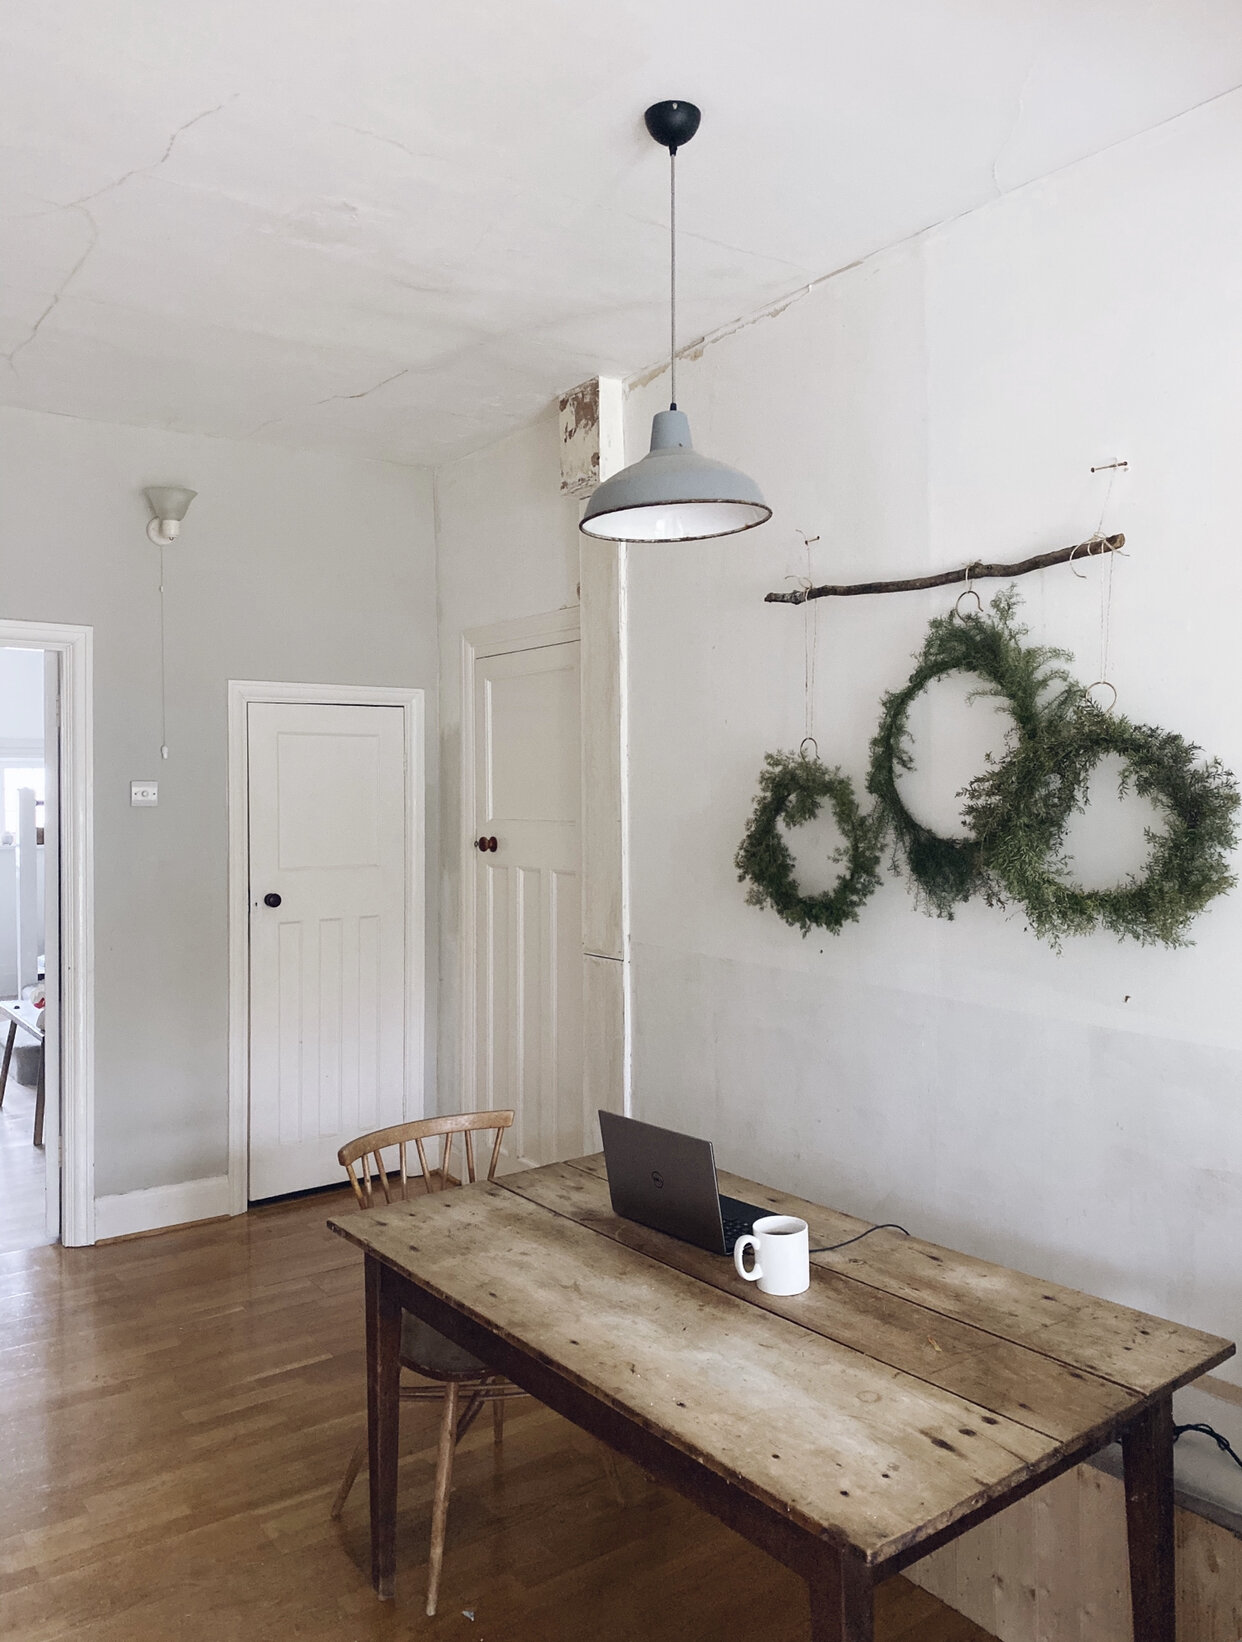
The walls before. Maybe I shouldn’t have been so hasty to strip that wallpaper off

I actually con’t believe how much better it looks! The cladding really adds interest to the room and Snow is the perfect crisp white for freshening up the space.

Freshening Up the Floors
If you are not a fan of the colour orange look away now! The floor we inherited was in perfectly good condition but as can often be the case, the varnish applied to the floorboards had taken a turn for the tango over time. In a DIY first (and potentially last) for me I buckled up went to B&Q and bought myself a belt sander to strip them back to a more natural shade of wood. I dithered for ages about whether to just seal them with a wax and leave them au naturel but ultimately decided to paint them an off white. I do love how light and bright the room now feels but part of me still wonders whether I made the right decision! I guess I will have to live with that #RenovationRegret though because if given the choice of spending another 48 hours belt sanding or fly fishing with Nigel Farage I would probably choose to get my tackle out.

The floor before in all it’s tango glory

The floor afterwards painted in off-white. We purposely just did one coat to allow some of the grain of the wood to still show through.

In the kitchen space I have broken up the white floor with a jute rug
Switching Up the Seating
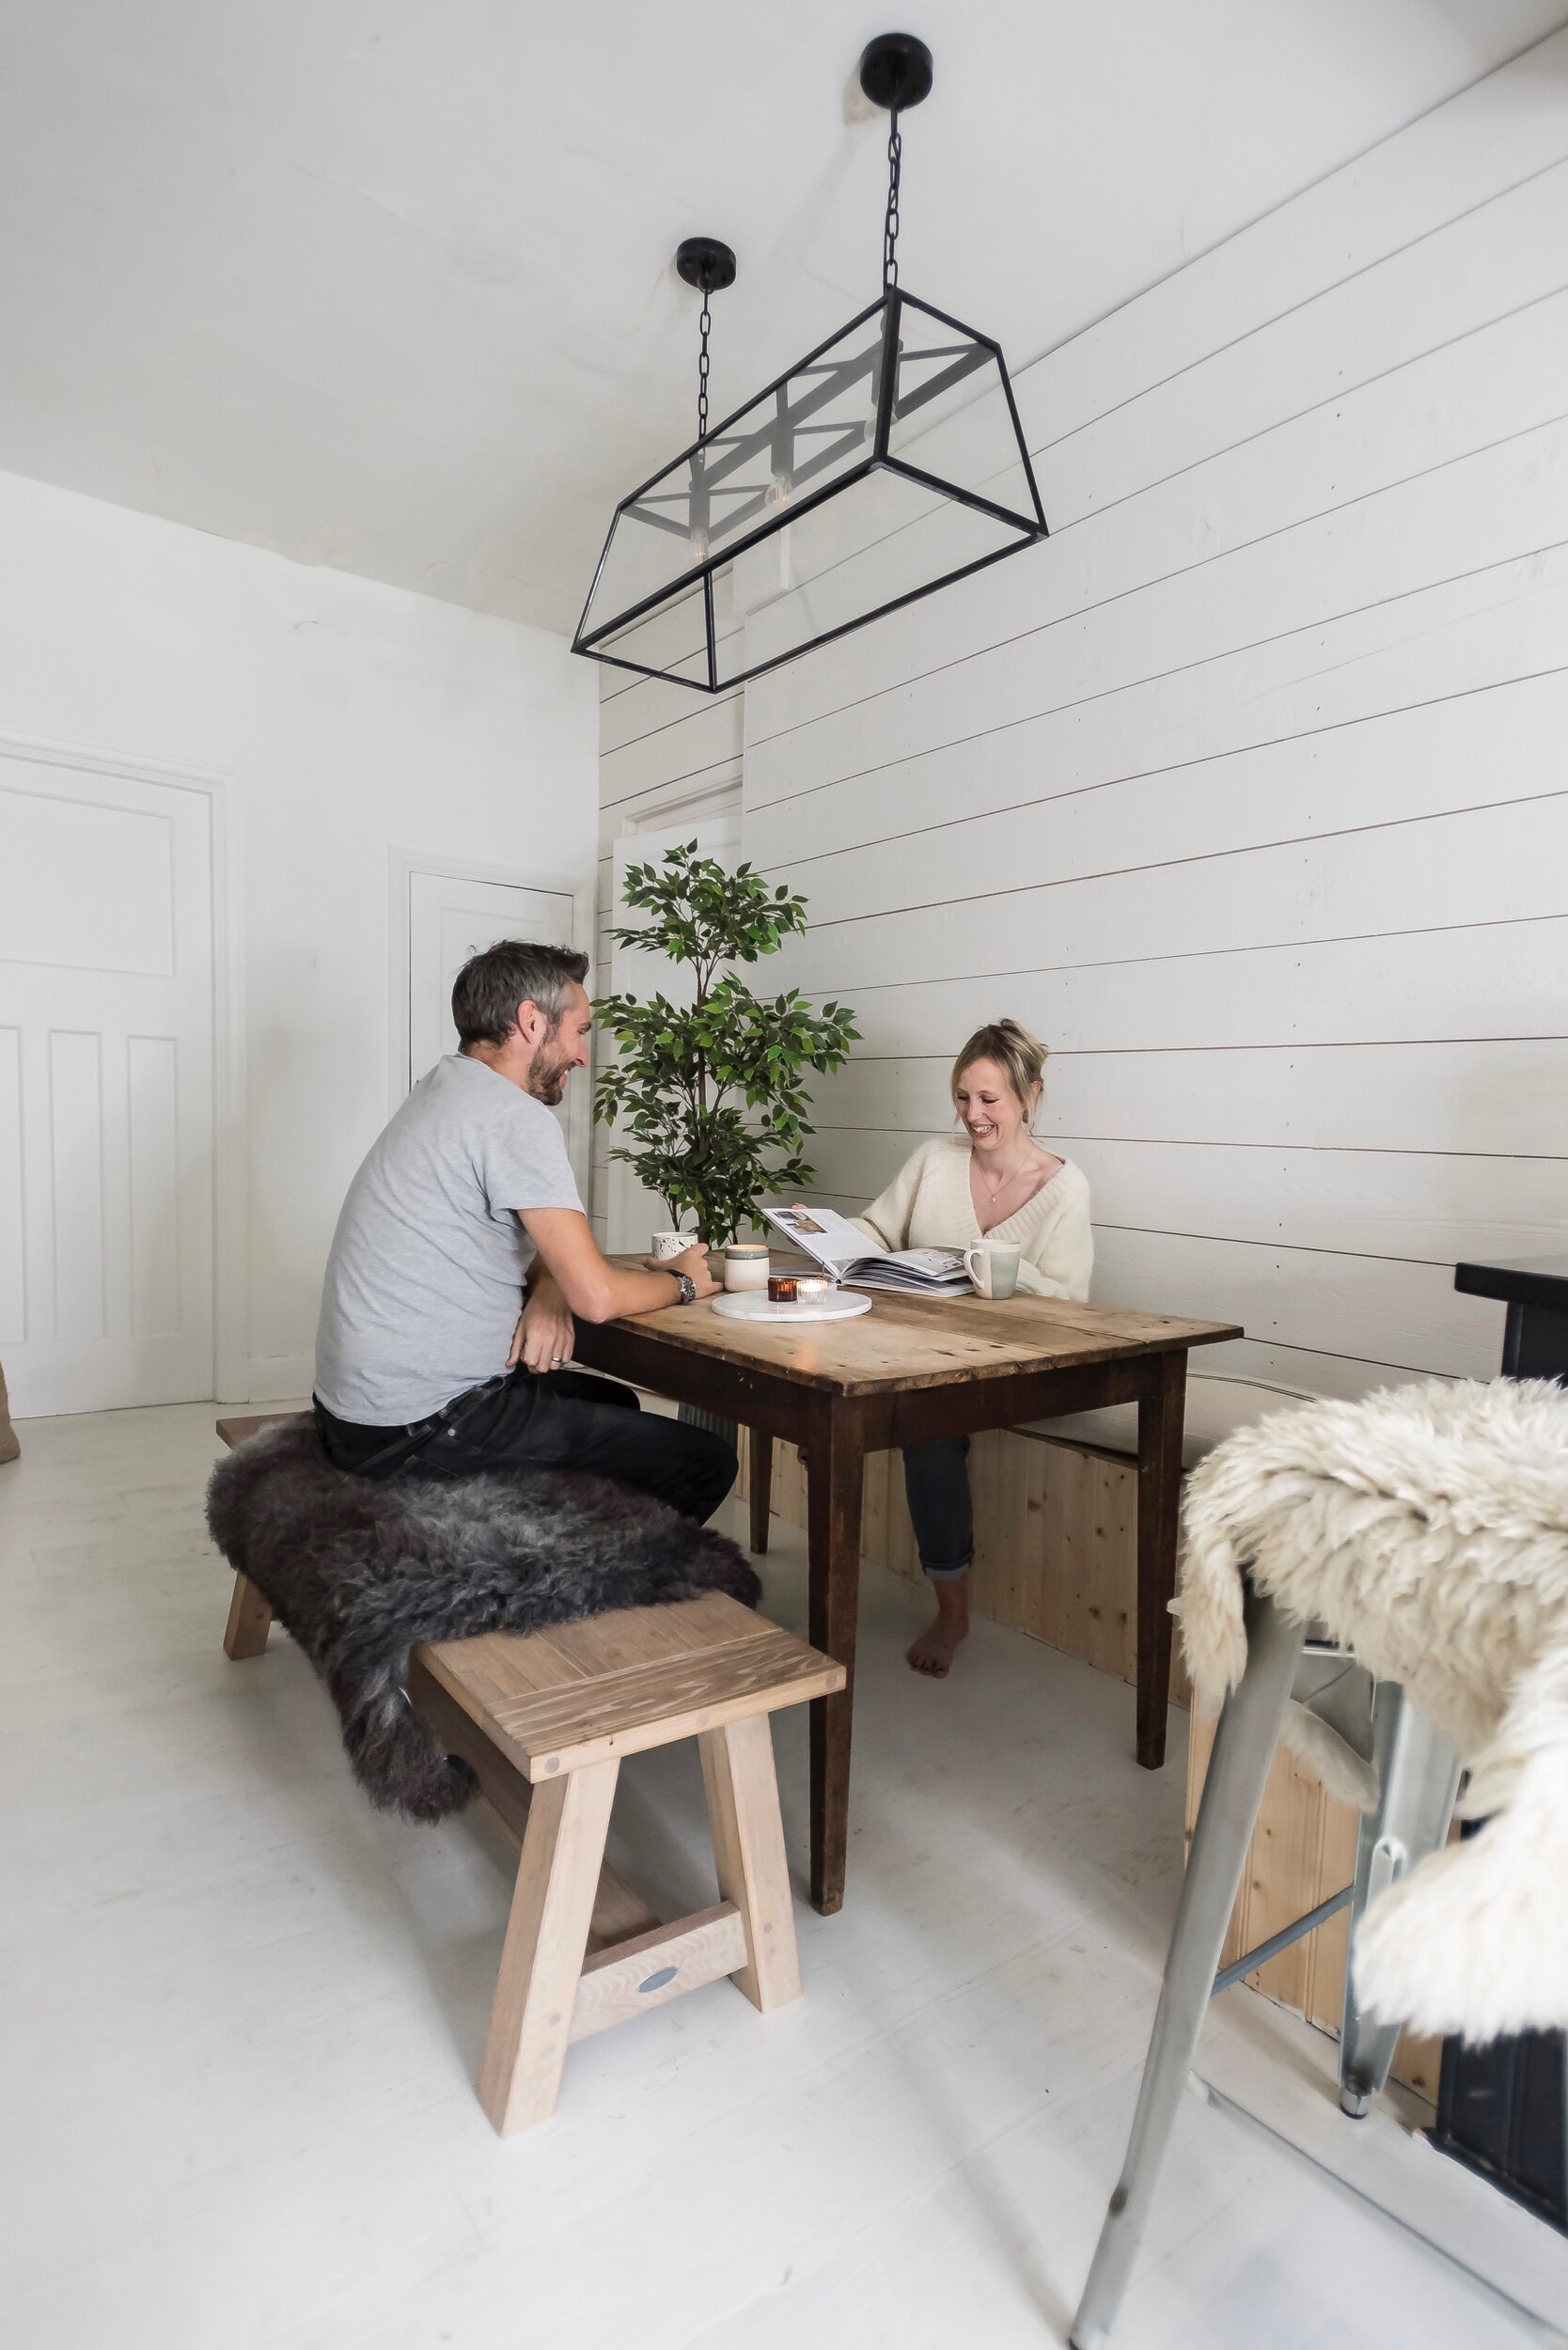
We already have a dining table located through the double doors from the kitchen so the idea behind creating a second dining space in the kitchen was for this to be a more relaxed, informal option that channeled more of a cafe feel! With that in mind Mr Malmo built a bench seating area in.

Bench seating by Mr Malmo beautiful grainsack linen cushions by Maison Brocante - a great small interiors business

The grainsack bench cushions from Maison Brocante are really comfy. I still need to decide how to finish the bench seat itself but that decision can wait for another day (or year)
We have also added a Arundel bench from Neptune in a natural oak finish. It is nice and wide meaning we can comfortably fit three of us on it or one person can hog it! Layering a Neptune sheepskin on it adds coziness to the space and stops the white walls/floors feeling too stark.
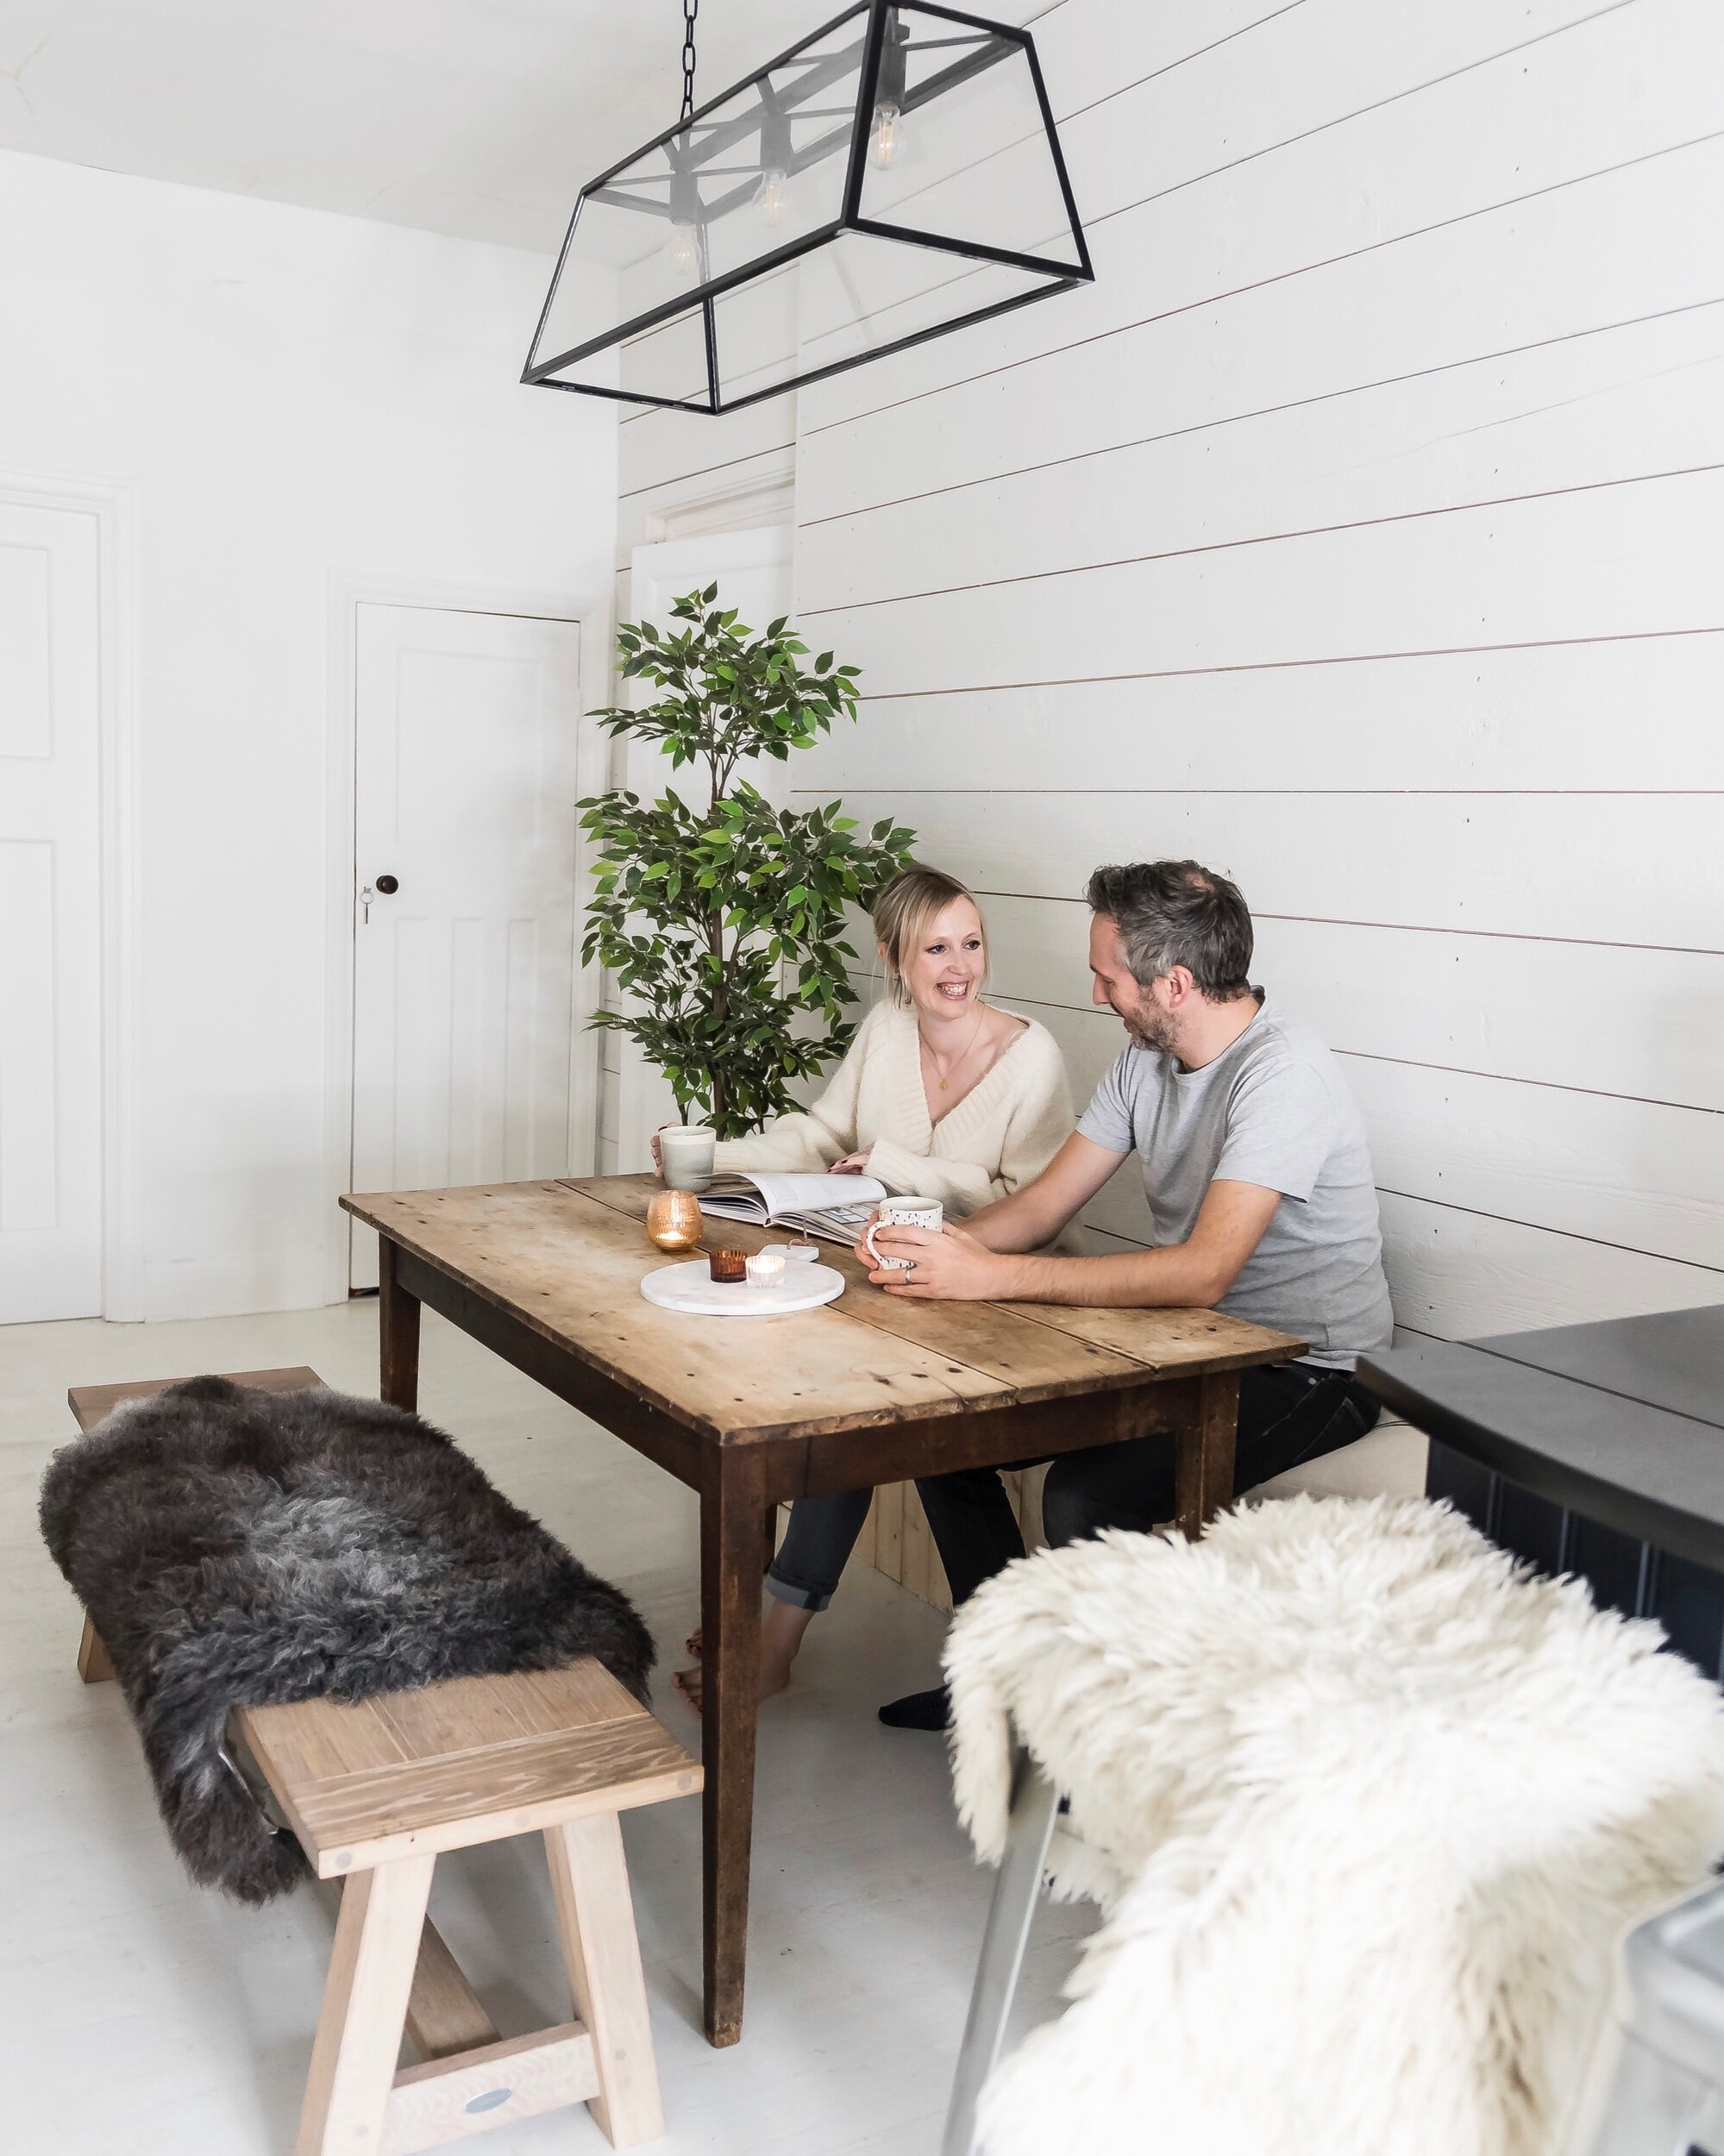
Lots more seating options to choose from now. I love how wide the Arundel bench is - perfect for our family of five!
Sometimes i let him sit on it
To tie the two dining spaces together we have a set of Wardley chairs which echo the kitchen/diner colour palette. These chairs encompass everything I love about Neptune - they ooze beautiful craftsmanship that is built to last and the spindle back design is a simple classic that will endure beyond any seasonal trends. You can choose to have them in any of the Neptune paint range finishes or in beautiful natural oak.

We have the Wardley chairs in Ink and Snow to echo the colours in the kitchen and tie the two spaces together

Letting the Light In
One of the great things about this house is the ceiling heights! All of the rooms have lofty ceilings but in the dining space we had just one overhead pendant light that got completely lost in the space and no cosy lighting options at all. Although obviously that is something Mr Malmo lost zero sleep over given he would happily sit watching TV with the kind of lighting they use to illuminate crime scenes. Over the table the lone interrogation pendant light has been replaced with the Browning three light pendant from Neptune which fills the ceiling space so much better and adds a discreet industrial nod to the space. Adding in walllights (the Brompton - which have a gorgeous brass finish for an really affordable price) means we now also have a lower light option as well. I love putting these on during the day when it is raining outside to create a cosy feel.

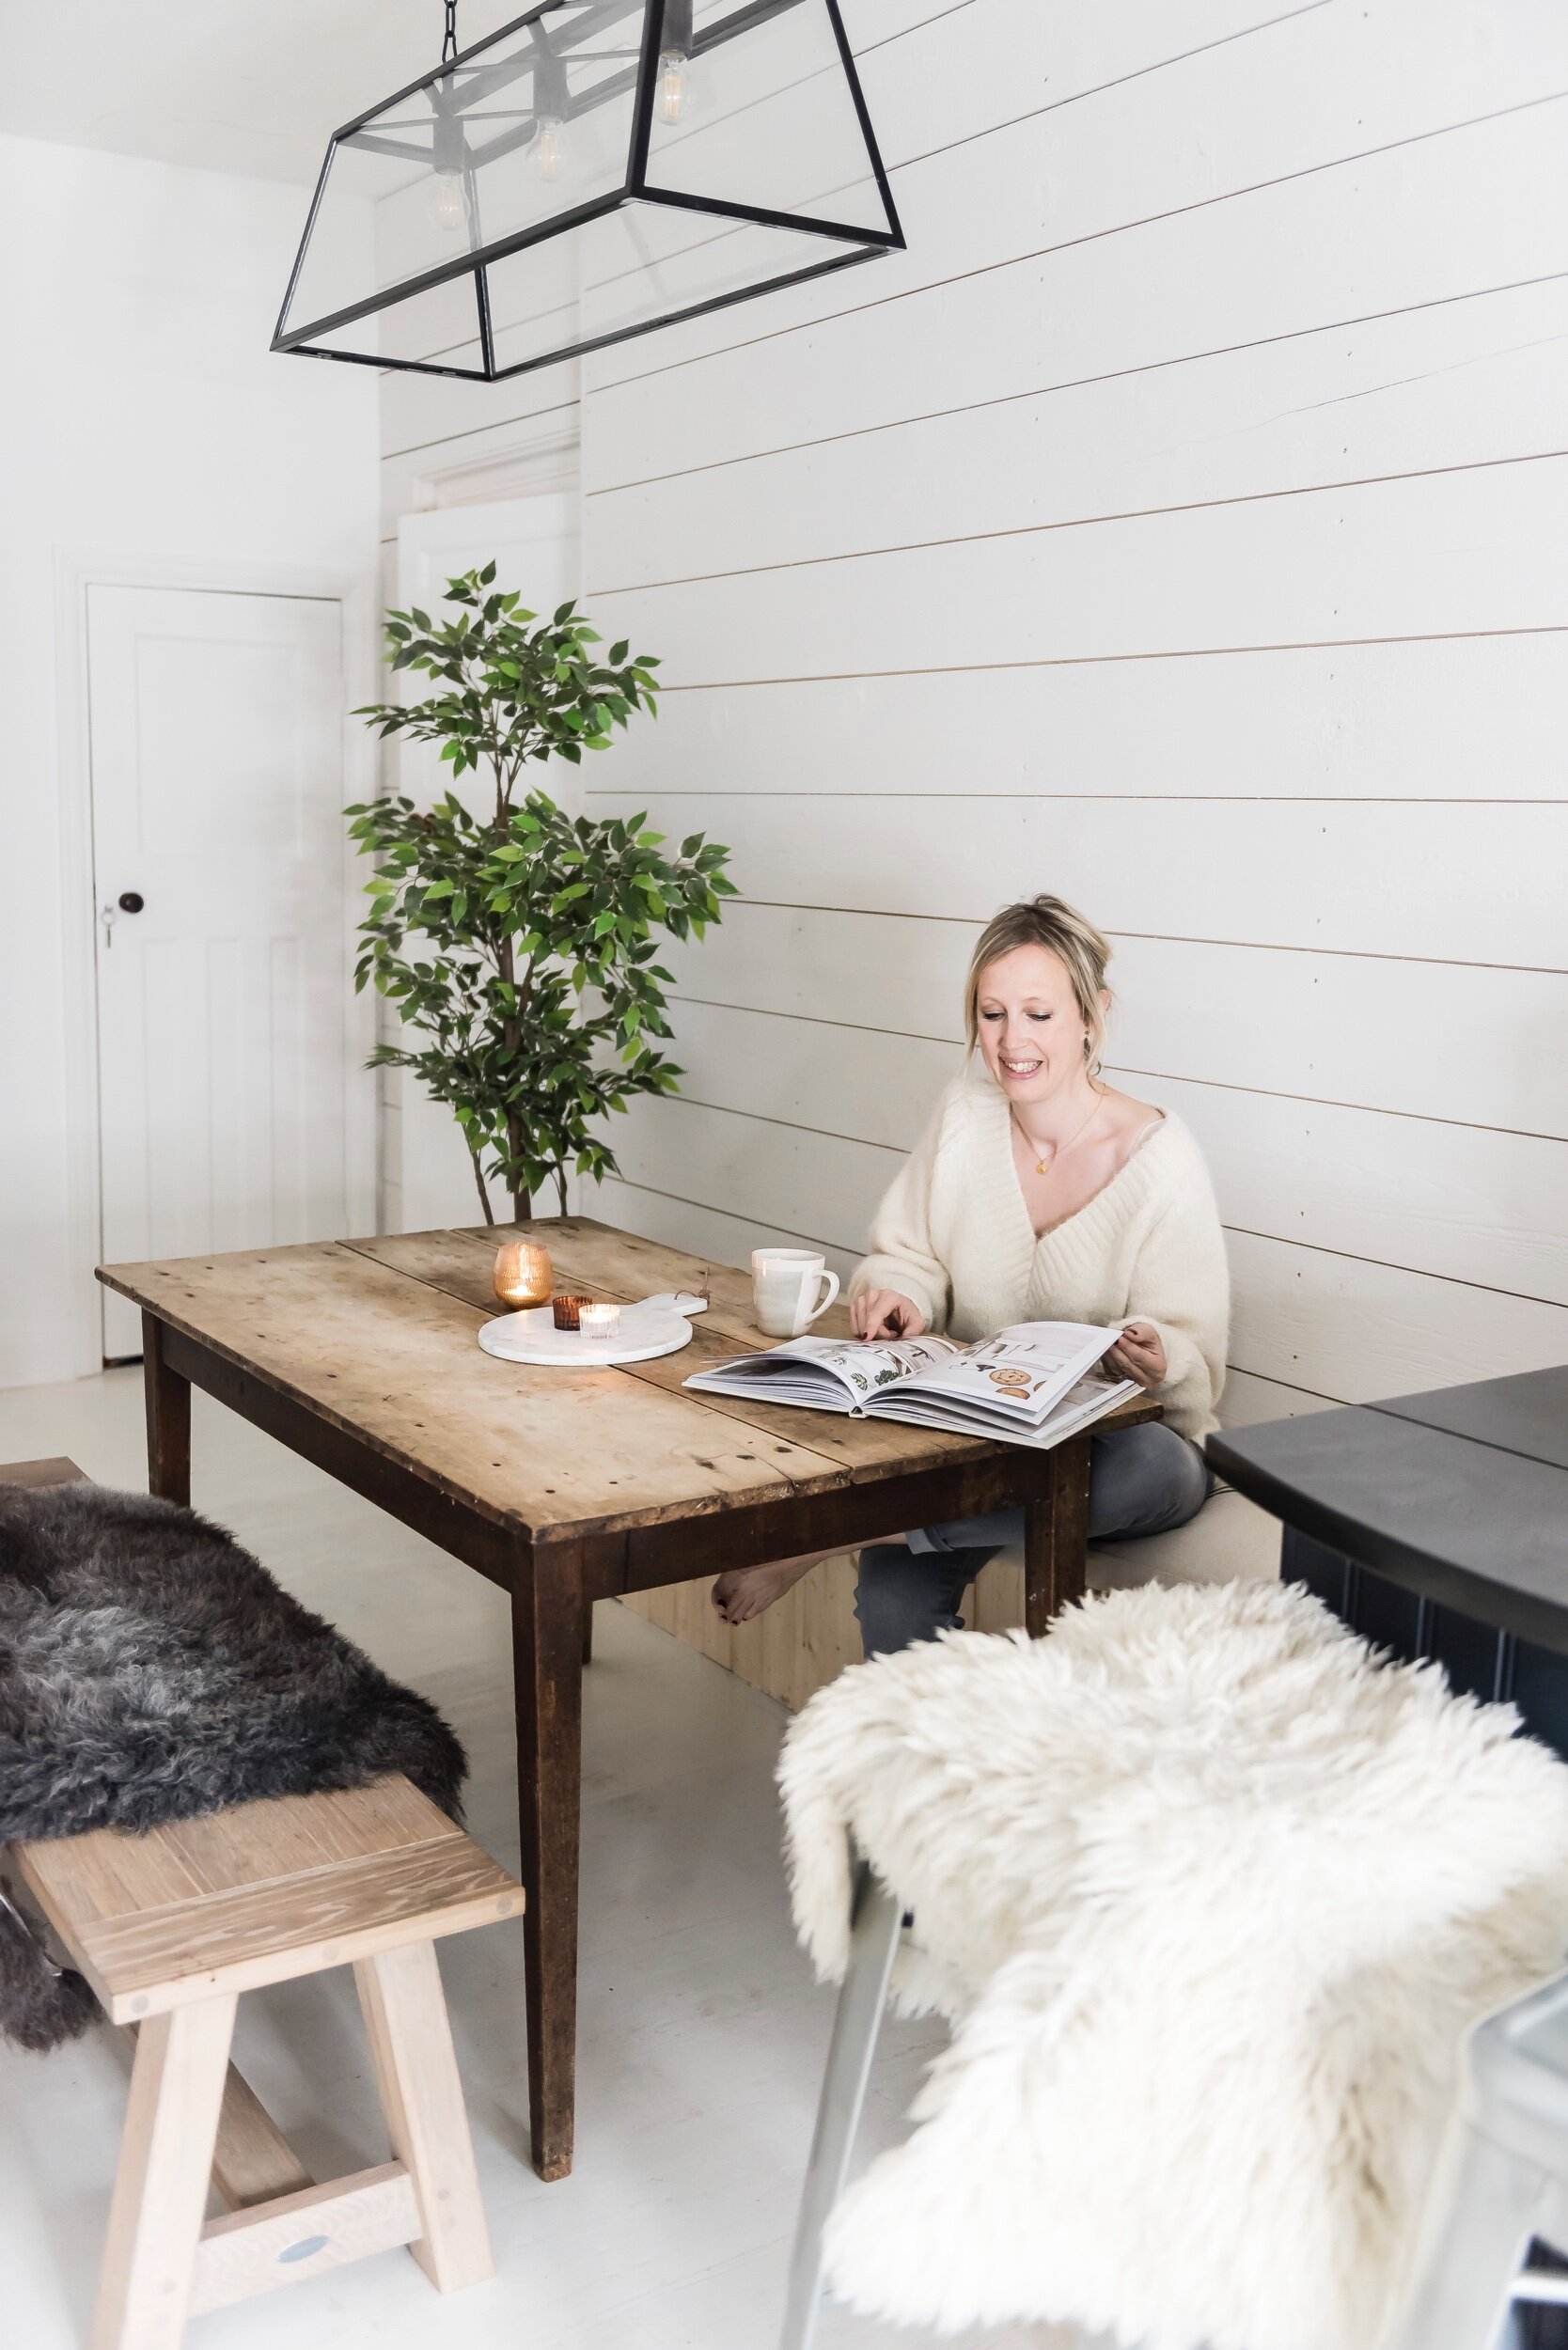
The lighting situation is now significantly less interrogation cell! This three bulb pendant light is a great choice if you have a larger space to fill

These brass Brompton wall lights are a great price for a really high quality finish. I am still un-decided on the picture shelf - do you think I might need to add another one?
Creating Crittall Style Doors (on a budget)
Perhaps the most ambitious part of the revamp was creating my own version of Crittall doors. Woodworking skills are not something listed on my CV for a reason - making a simple Roman Spear in middle school took me 11 weeks, saw me snap approx 67 jigsaw blades and drove my CDT teacher to the edge of a nervous breakdown. The existing doors dividing the kitchen from the more formal dining space were pretty non descript and I thought they would make a great feature if they were given a crittall makeover. Because in the longer term they will be removed when we knock the two rooms together putting in an actual crittall dividing screen was not an option. However, armed only with a tin of Charcoal paint from Neptune, a paintbrush, 11mm timber strips from B&Q and gorilla glue I think I have delivered a pretty good short term crittall dupe! Although it is at this point I should probably confess that I may have called upon Mr Malmo to do the part that involved the hacksaw and superglue. The chances of me either losing a finger or sticking one to a window were just too high otherwise!

The partition doors before

And after their Crittall makeover. All it took was two coast of Neptune Charcoal paint, some 11mm timber strips cut to size (by Mr Malmo) and some gorilla glue!
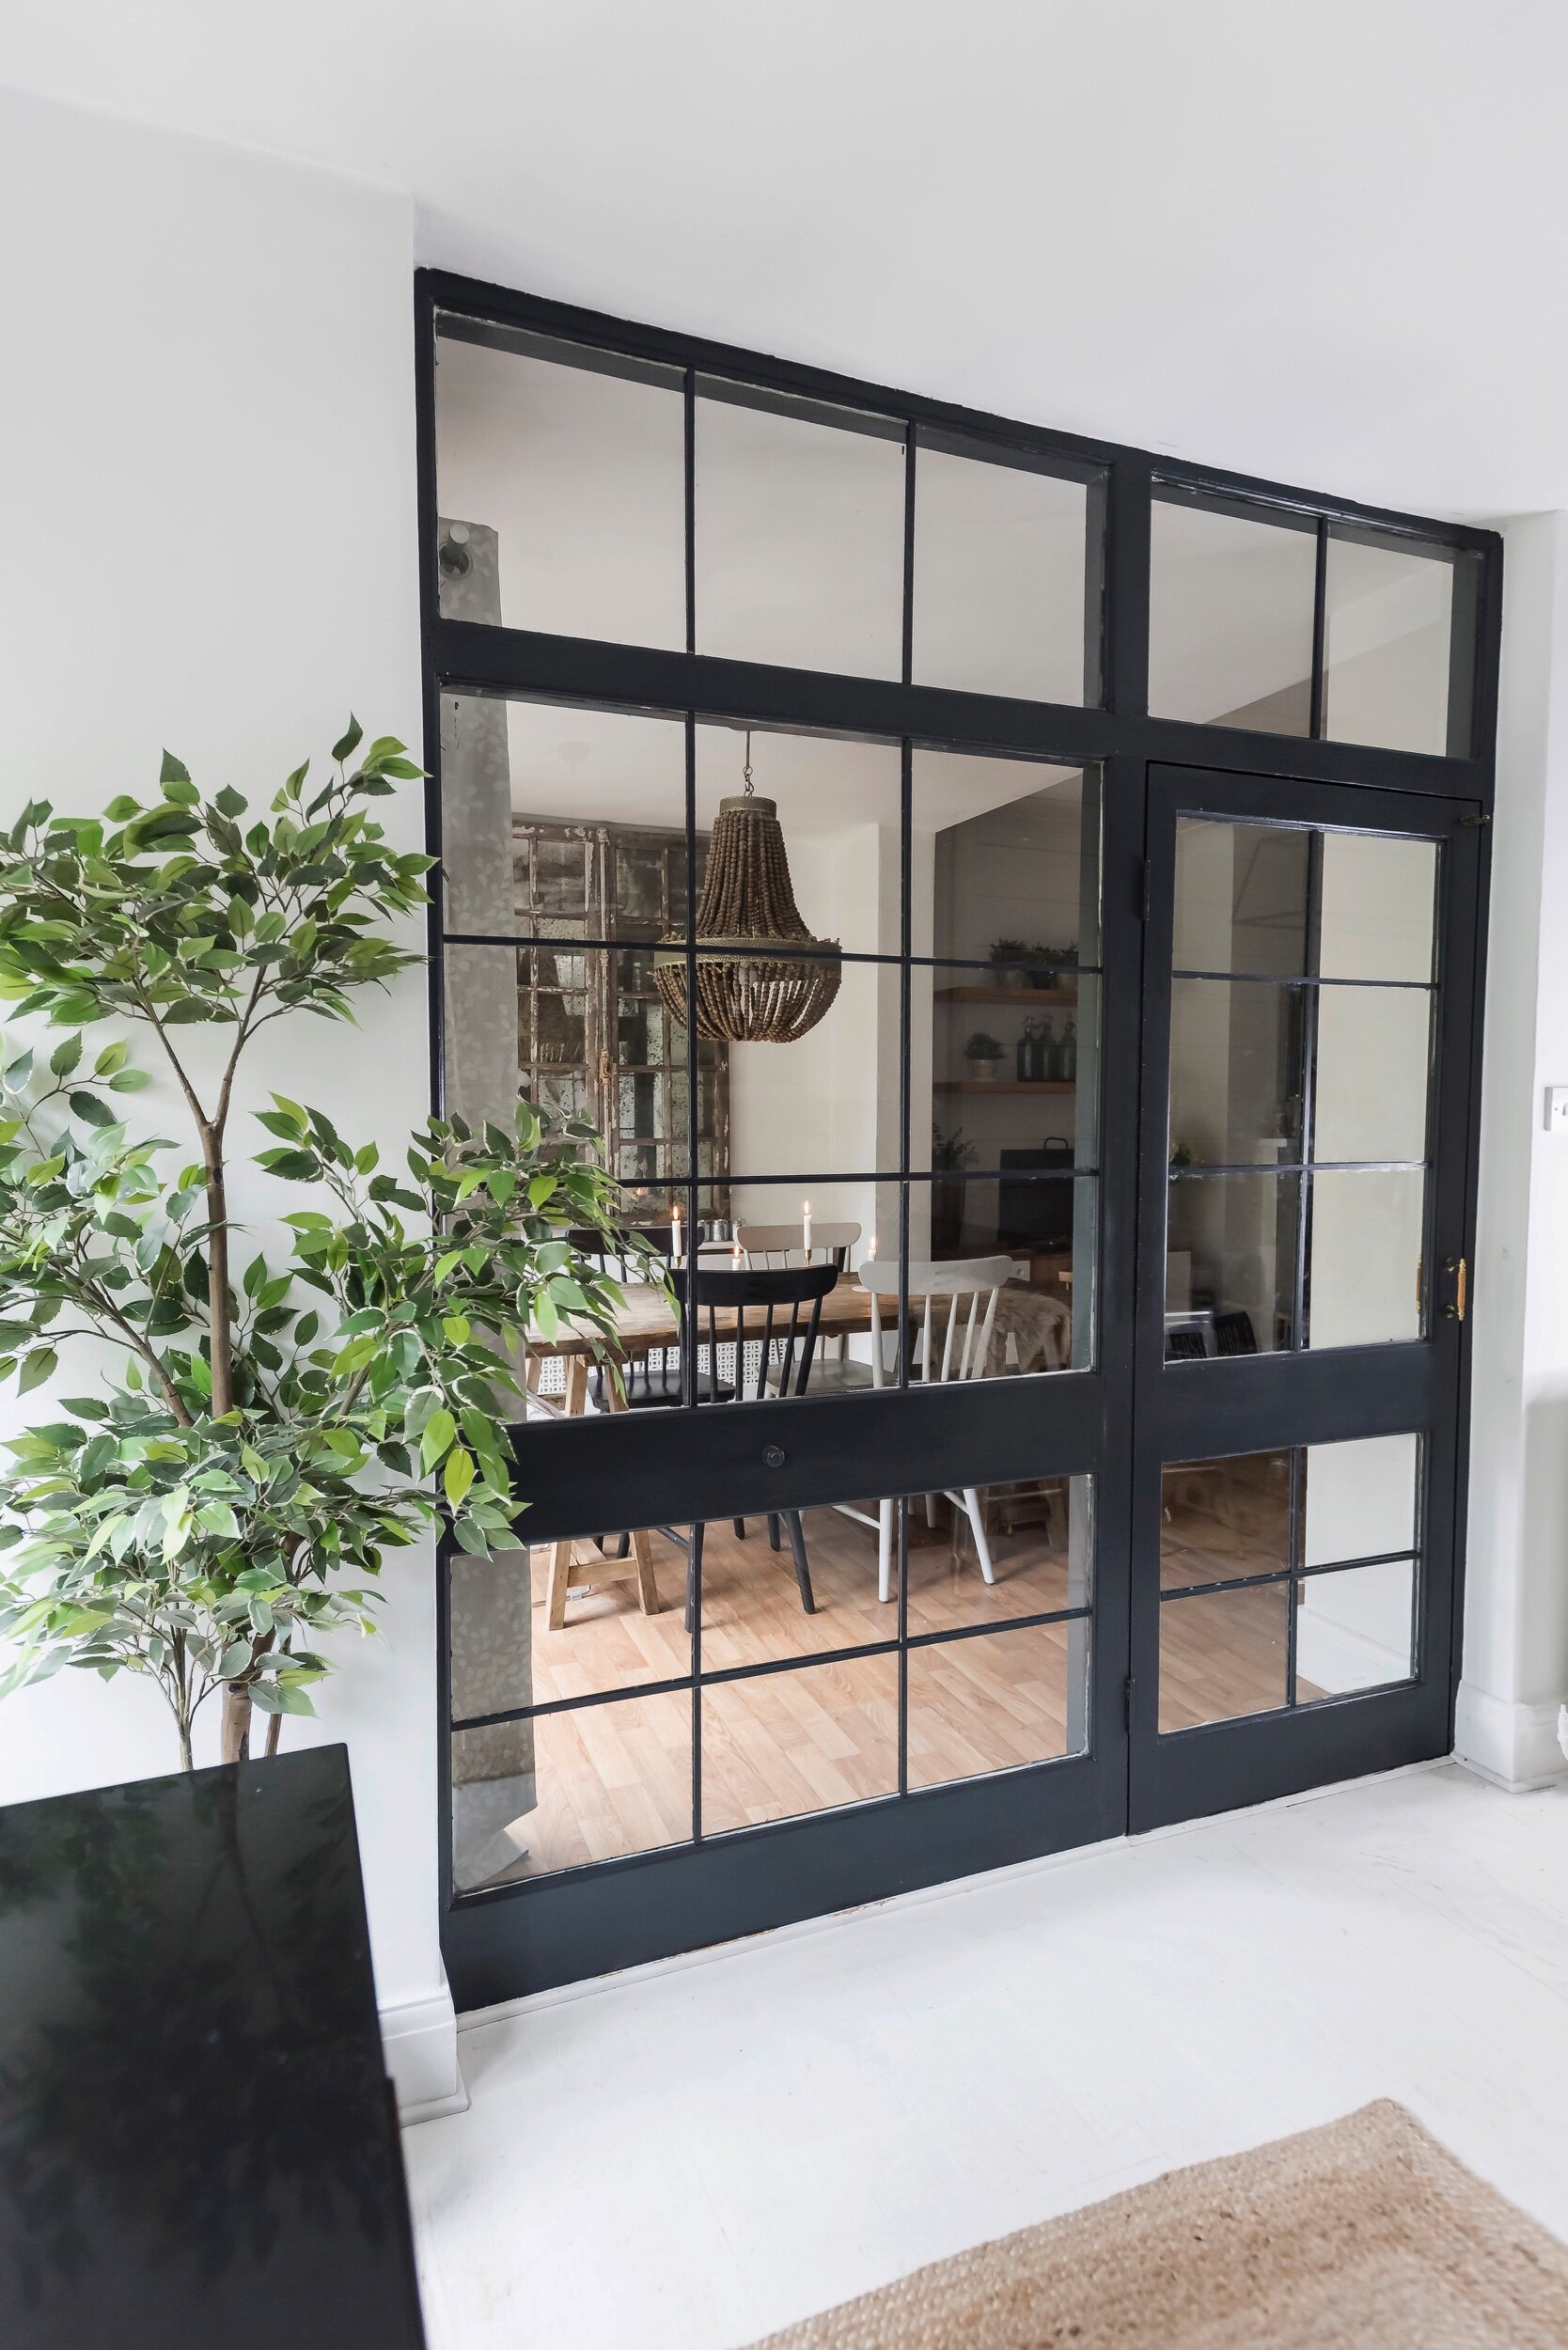
It’s my new favourite shade of dark paint as has less of a blue undertone than Railings. I just need to touch up the paint job a little bit where my frog tape skills lacked a little!


Crittall feels on a budget
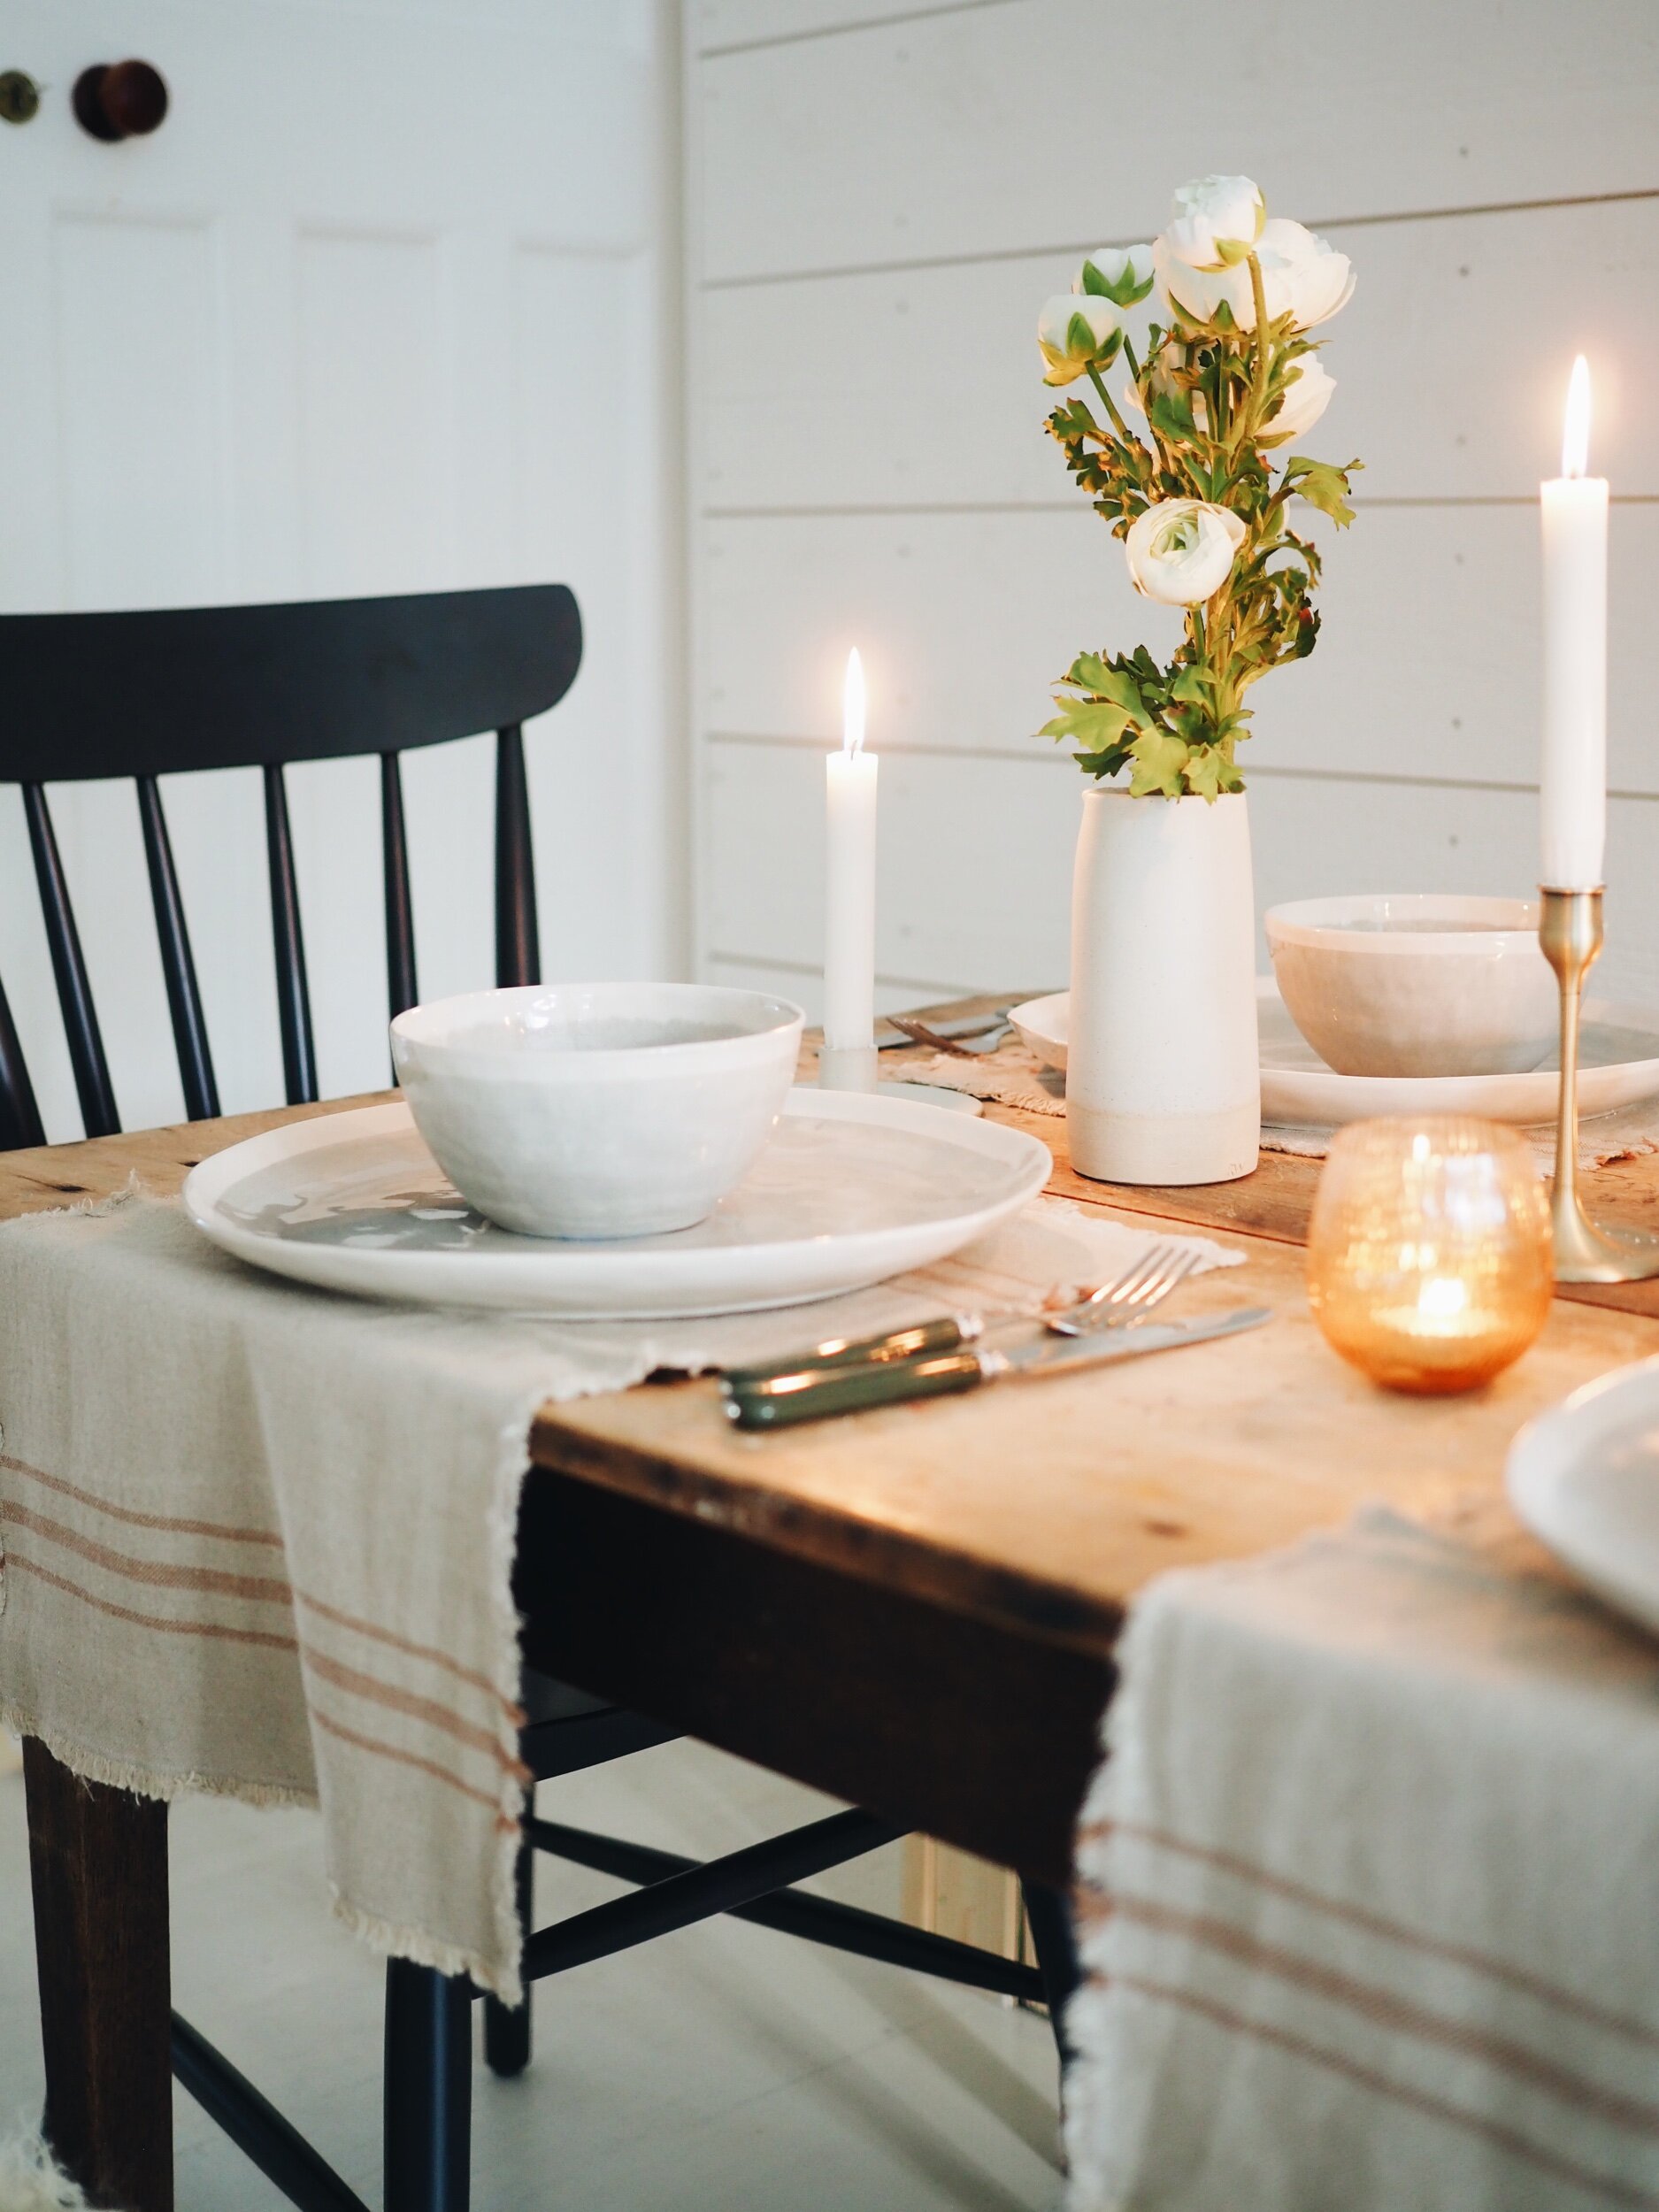
Tablescaping Time
Although it has been a long and winding road to the finish line now that the space is finished I couldn’t be happier. It has turned what was a dark, gloomy bit of dead space into my own personal Scandi/Rustic cafe and become the real hub of the house - where we come together to eat, read, draw (dinosaurs) and chat. And now that it is finished it means I can finally indulge in one of my favorite hobbies: tablescaping!
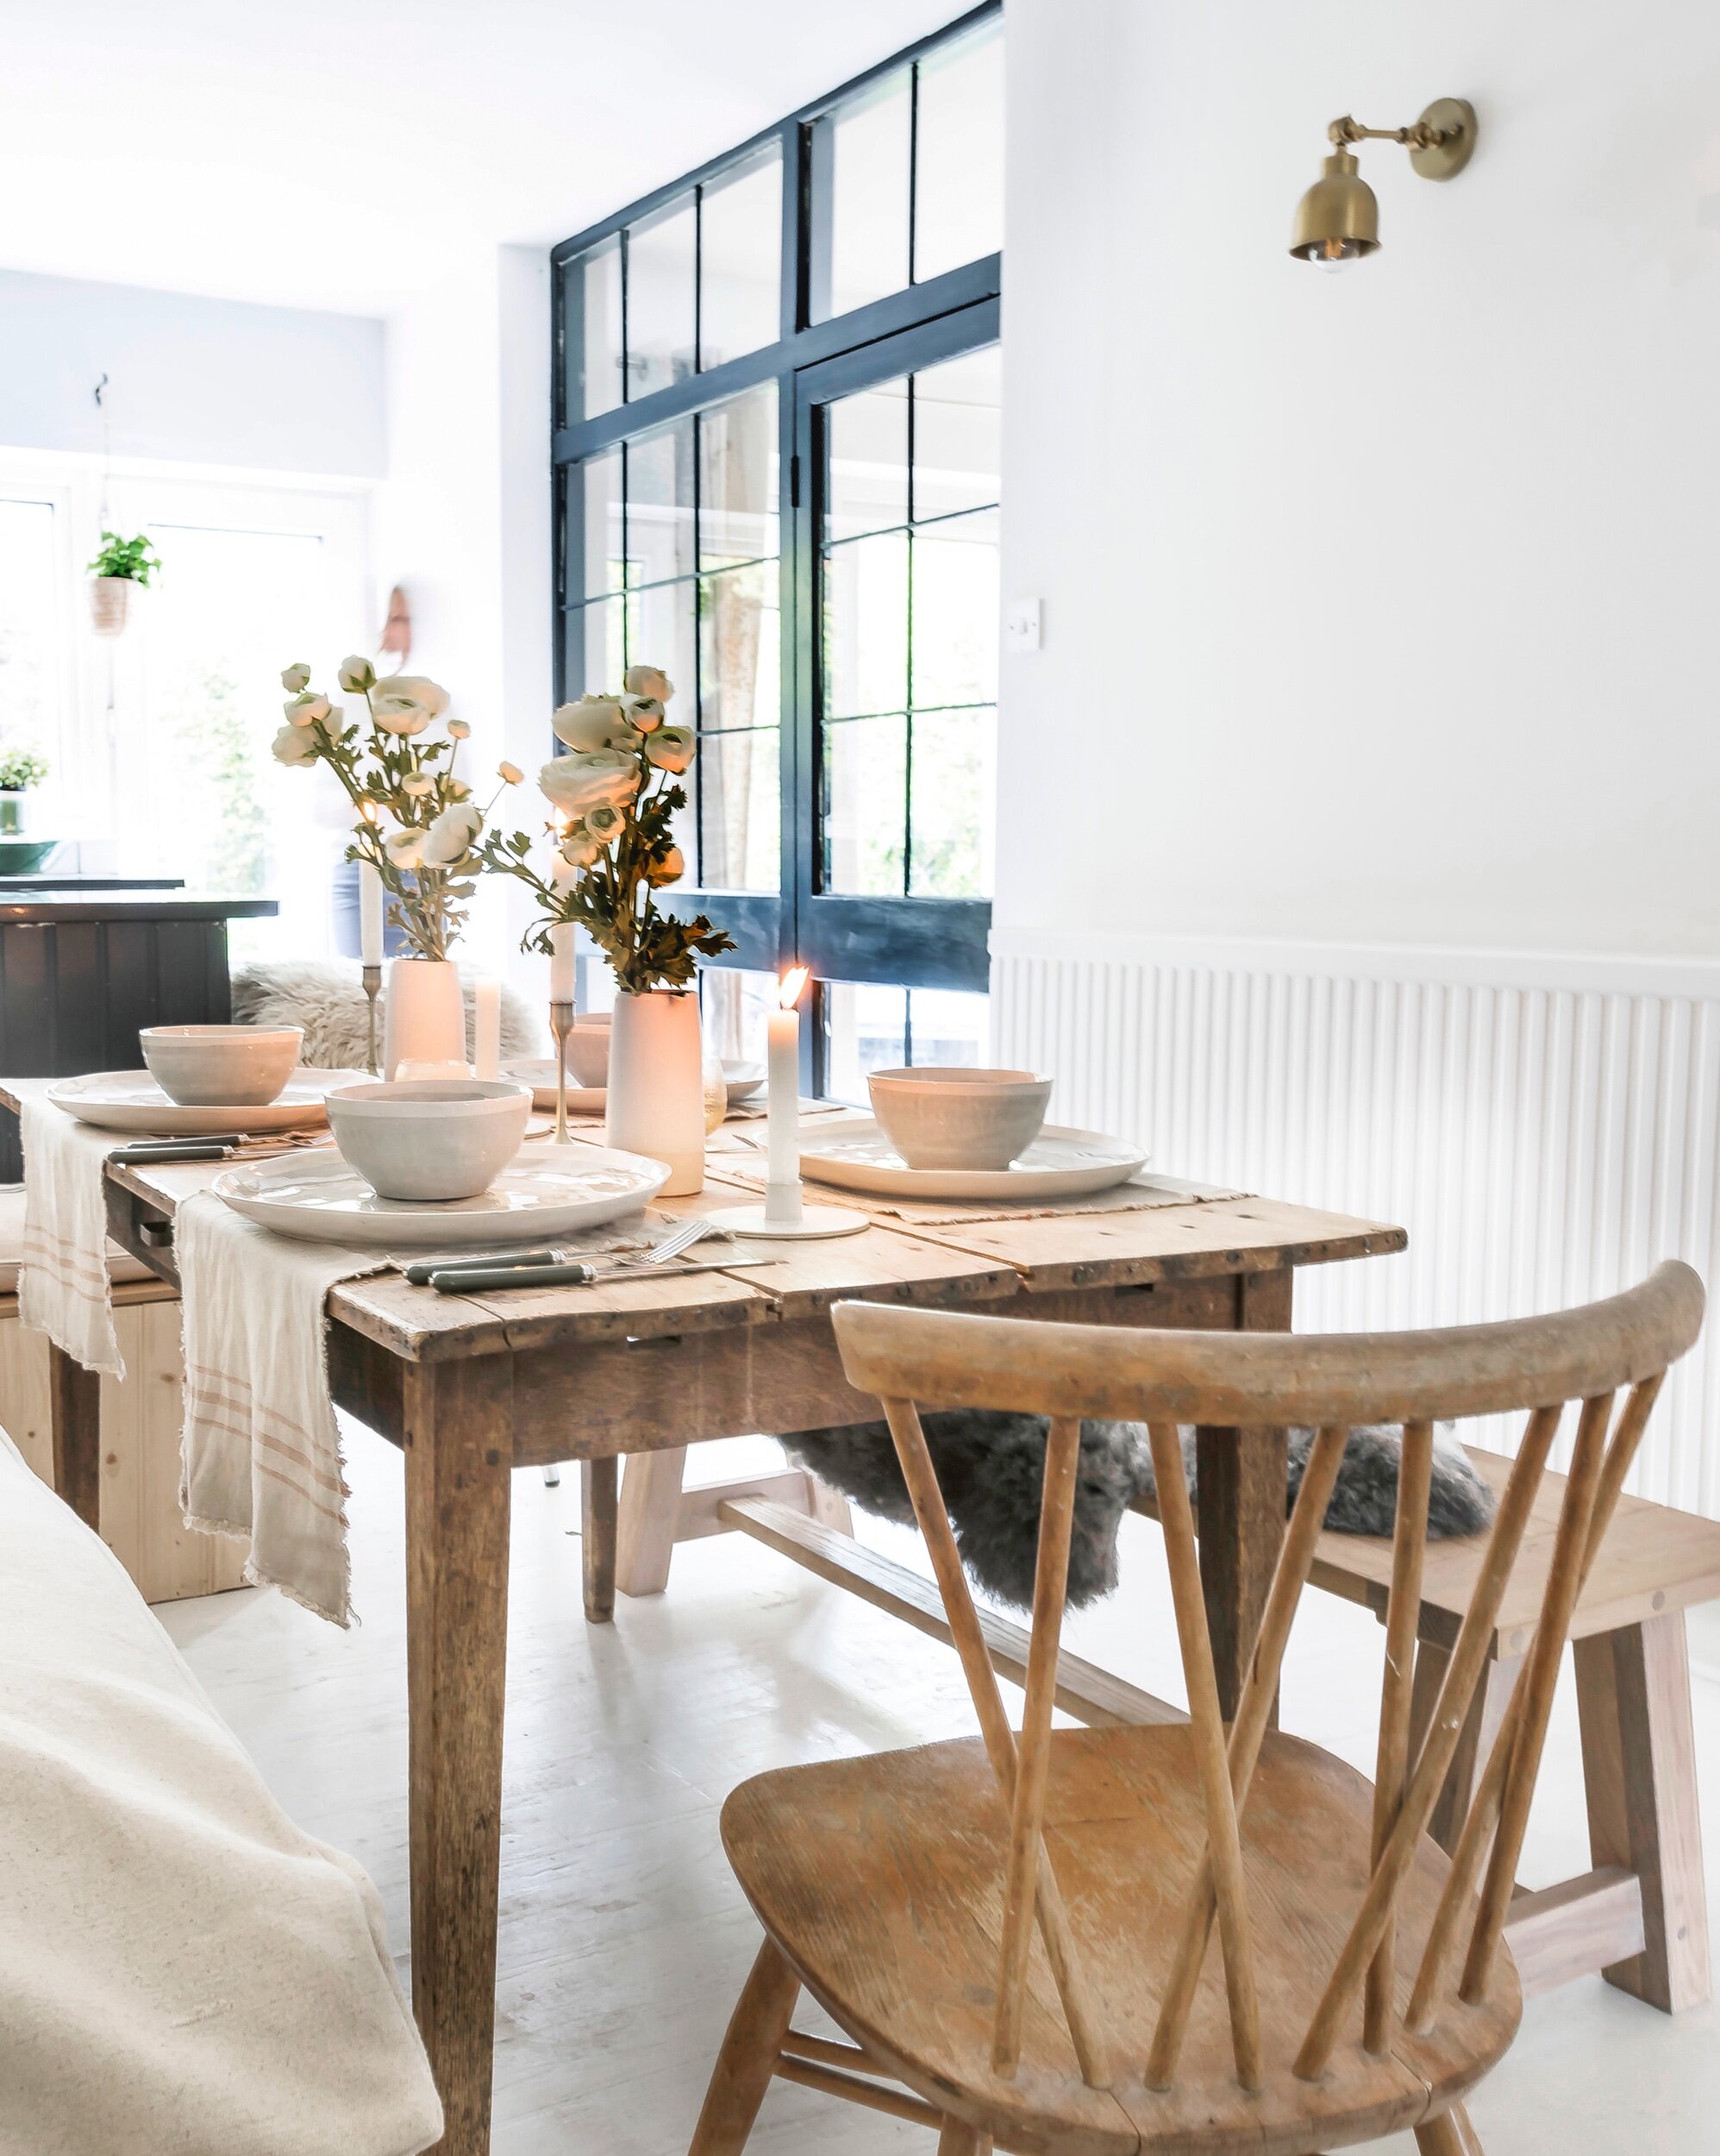

Now that the space is finished I can tablescape to my heart’s content
I loved pulling this scheme together using some accessories borrowed from Neptune’s Autumn/Winter collection. The Lulworth tableware in dappled grey looks great against my vintage wooden table with cutlery in Olive (Neptune’s colour of the year) adding a subtle contrast. In the centre of table I have played with different height candle holders,the Bayham and the Heddon and then added some flowers from Neptune’s range of greenery. This rannuculous is credibly realistic and definitely something I will be investing in.


Hopefully sometime before 2034 we will be able to host people back round our kitchen table but for now I am happy to stay home and enjoy the new space.

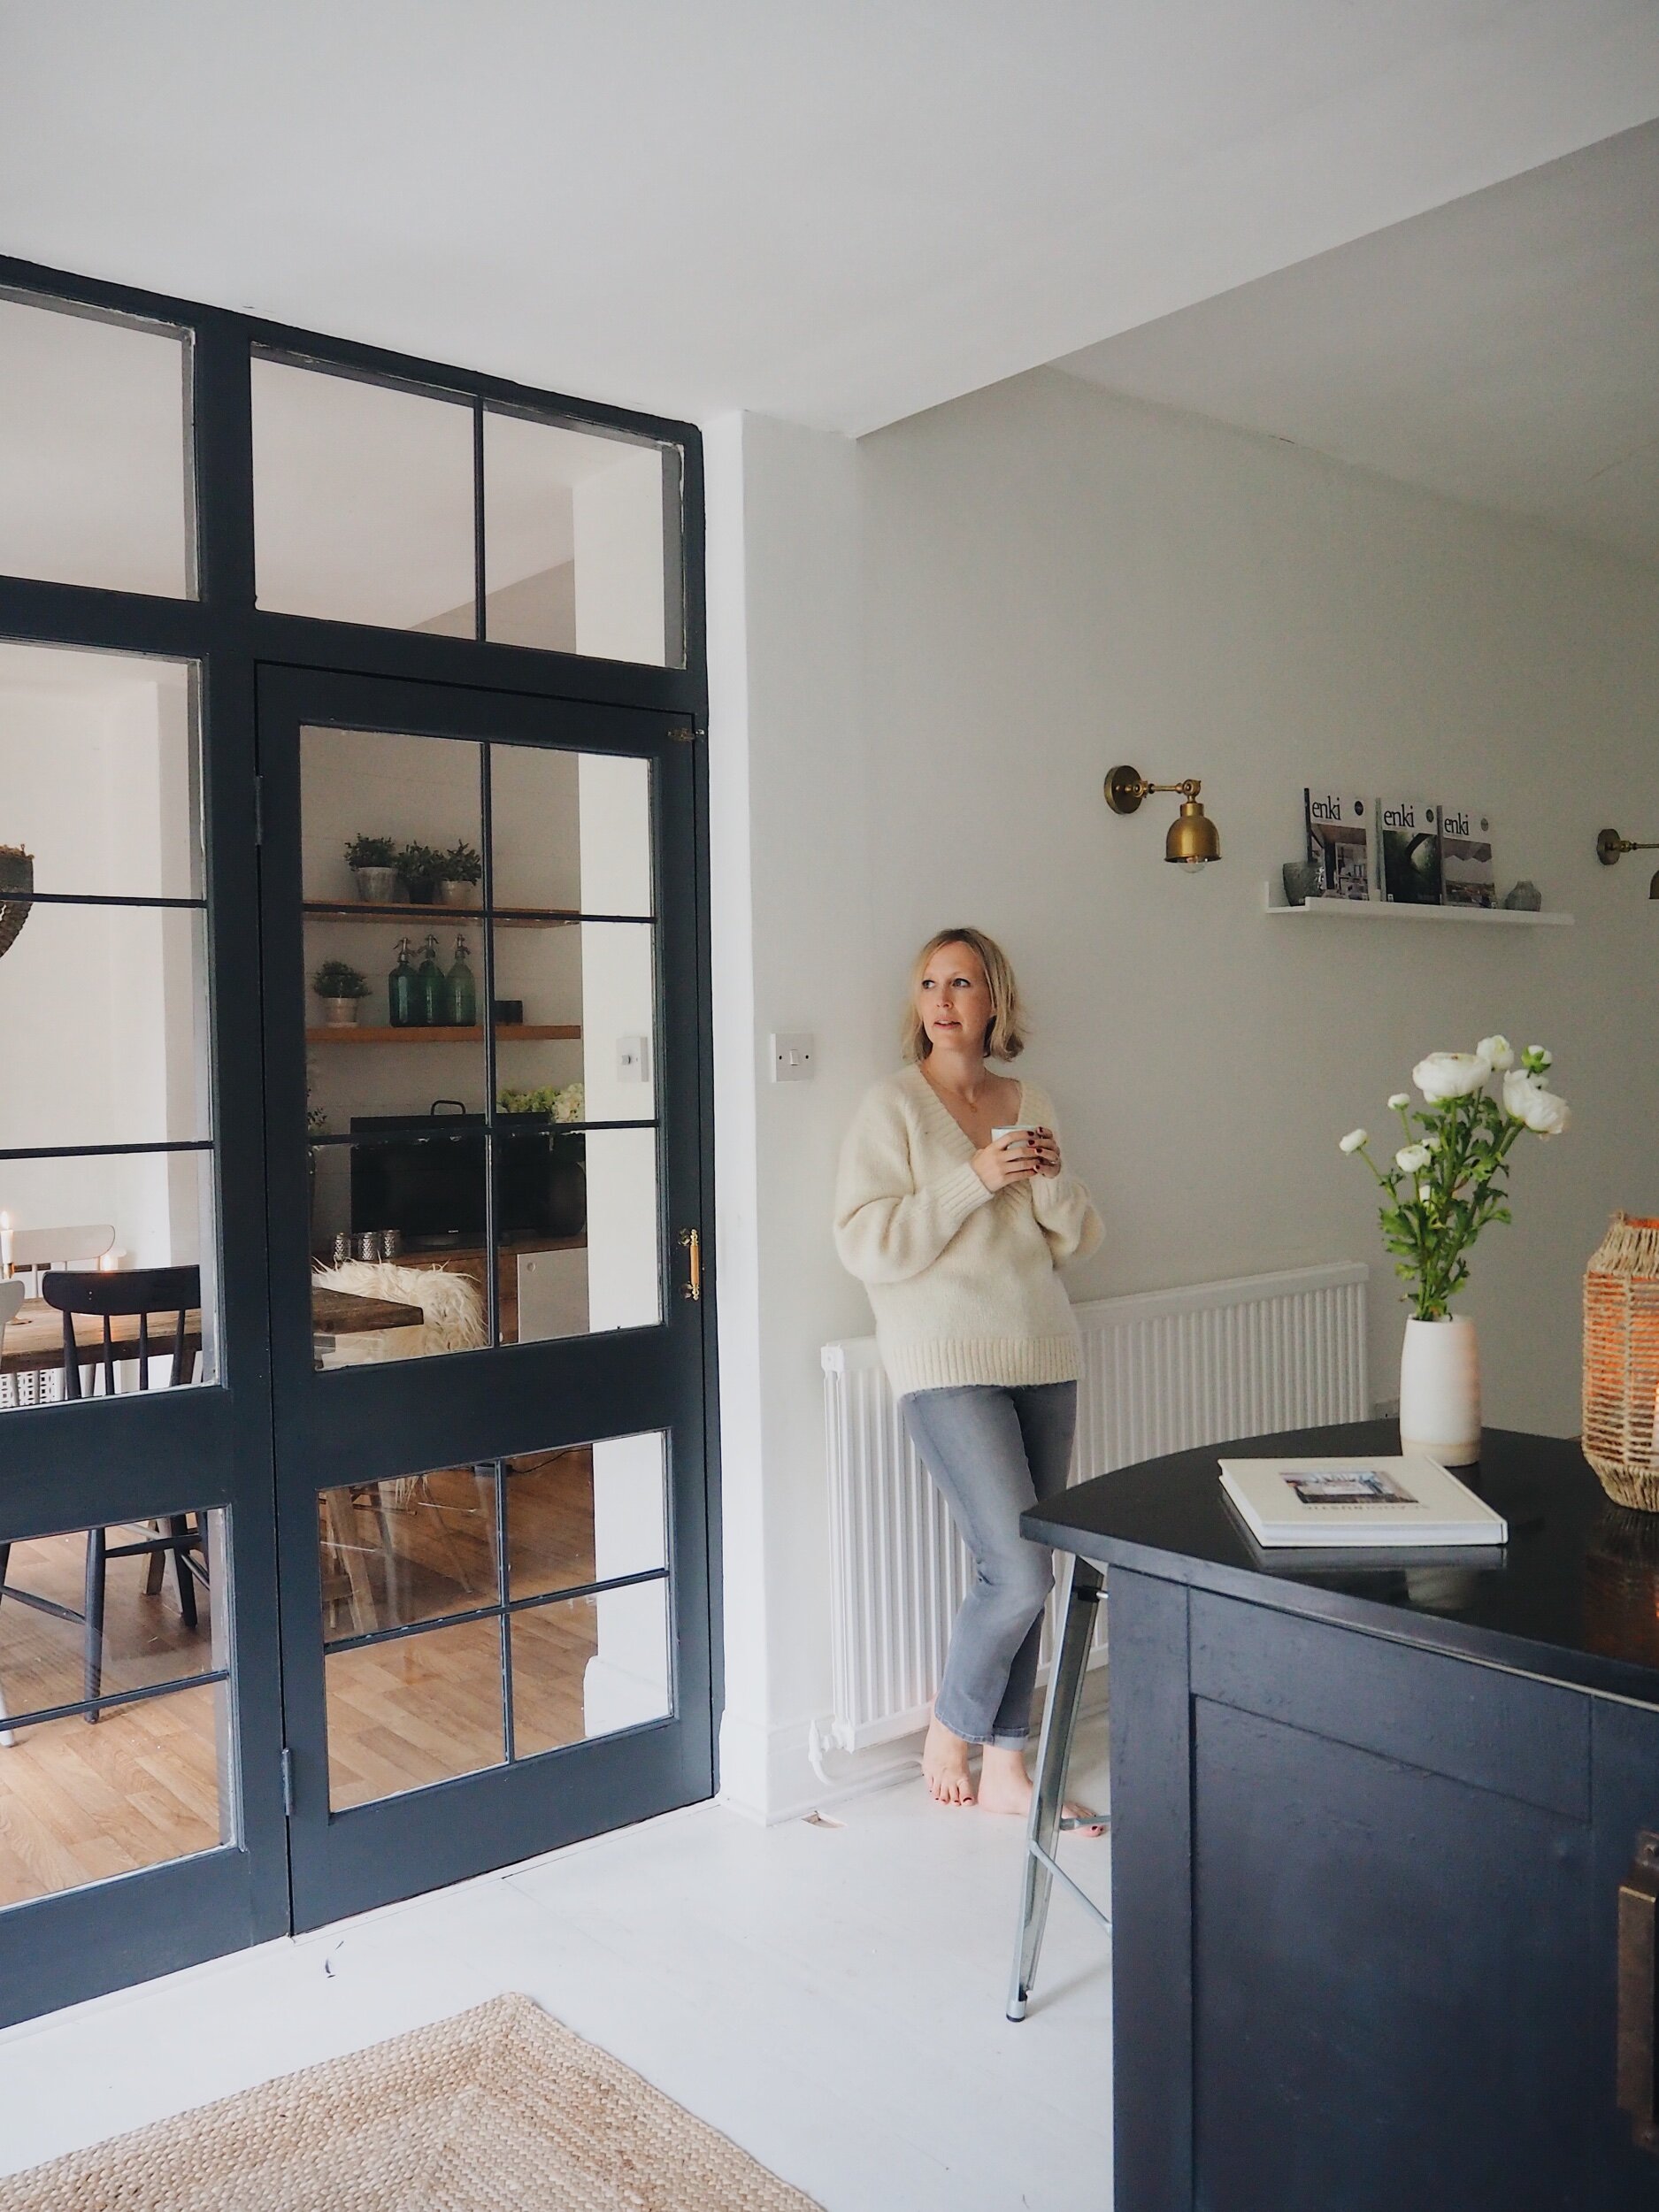
I am just a girl making eyes at her new faux crittall doors and trying not to burn my bum on the radiator
Thank you so much to Neptune for collaborating with me on this project and for the enormous patience you have shown me as I struggled to complete it in a global pandemic! If you are in need of interiors inspiration then do go and have a browse of their newly revamped website which has so much lovely interiors content to browse on it.
Paid Collaboration
Photos by @TiaTalula